
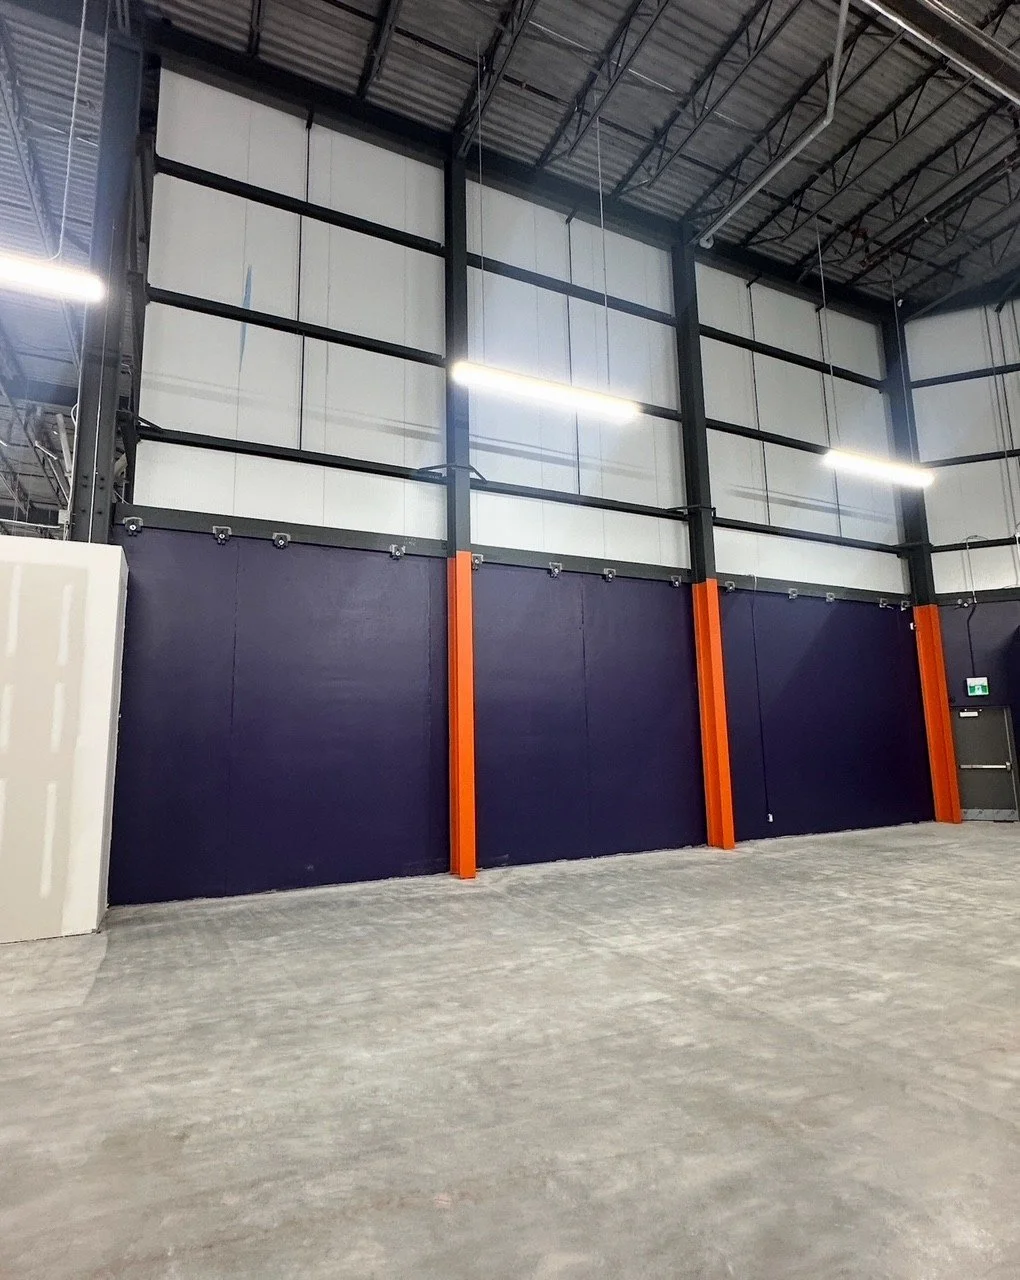
PicklePlex Aurora Sports Complex Painting
INEX Painting & Finishing provides specialised commercial painting services tailored to warehouses, sports complexes, and other large-scale facilities across Messa and surrounding regions. Our experienced team understands the unique demands of industrial and recreational spaces, delivering durable, safe, and visually professional finishes that meet operational requirements and regulatory standards.
What we offer
Surface assessment and preparation: Comprehensive inspections to identify substrate conditions, corrosion, previous coatings, and repair needs. Proper cleaning, sanding, patching, and priming to ensure long-lasting adhesion.
High-durability coatings: Industrial-grade epoxy, polyurethane, and acrylic systems designed for heavy traffic, chemical exposure, impact resistance, and easy maintenance.
Safety and regulatory compliance: Application of slip-resistant coatings, high-visibility markings, fire-retardant finishes, and coatings that meet occupational health and safety standards.
Temperature- and humidity-controlled application: Controlled processes for consistent curing and optimal performance in large interior spaces.
Rapid turnaround and phased scheduling: Minimise downtime with night, weekend, or phased work to keep operations running smoothly.
Line marking and wayfinding: Warehouse aisle lines, loading zone markings, pedestrian walkways, hazard zones, and directional signage applied with precision.
Sports-surface solutions: Durable wall, ceiling, and seating-area coatings; specialised floor coatings for courts and multi-use arenas that balance traction, durability, and sport-specific performance.
Colour consultation and brand alignment: Custom colour matching and branding integration to enhance facility identity and atmosphere.
Maintenance programs: Scheduled re-coating, touch-up services, and protective maintenance plans to extend the life of coatings and reduce long-term costs.
Safety-first project management: Trained crews, on-site safety coordinators, and adherence to all relevant safety protocols and insurance requirements.
Why choose INEX Painting & Finishing
Commercial expertise: Years of experience on warehouses, distribution centres, manufacturing plants, and sports facilities.
Quality materials and workmanship: We use industry-grade products and best practices to deliver durable, cost-effective results.
Project coordination: Clear timelines, minimal disruption, and coordination with facility managers to meet operational needs.
Local knowledge: Familiarity with regional climate considerations and building standards to ensure appropriate coating selection and application.
Warranty and aftercare: Written guarantees and responsive aftercare support.
Typical applications
Interior and exterior warehouse walls, columns, and ceilings
Concrete and mezzanine floor coatings
Loading dock areas and ramps
Fire-retardant and corrosion-resistant coatings for structural steel
Court coatings, spectator areas, and concourses in sports complexes
Locker rooms, fitness areas, and multipurpose rooms
Exterior metal panels, soffits, and trim
Contact us for a project evaluation and quote. We’ll assess your facility, recommend appropriate coating systems, and propose a schedule that aligns with your operational needs.
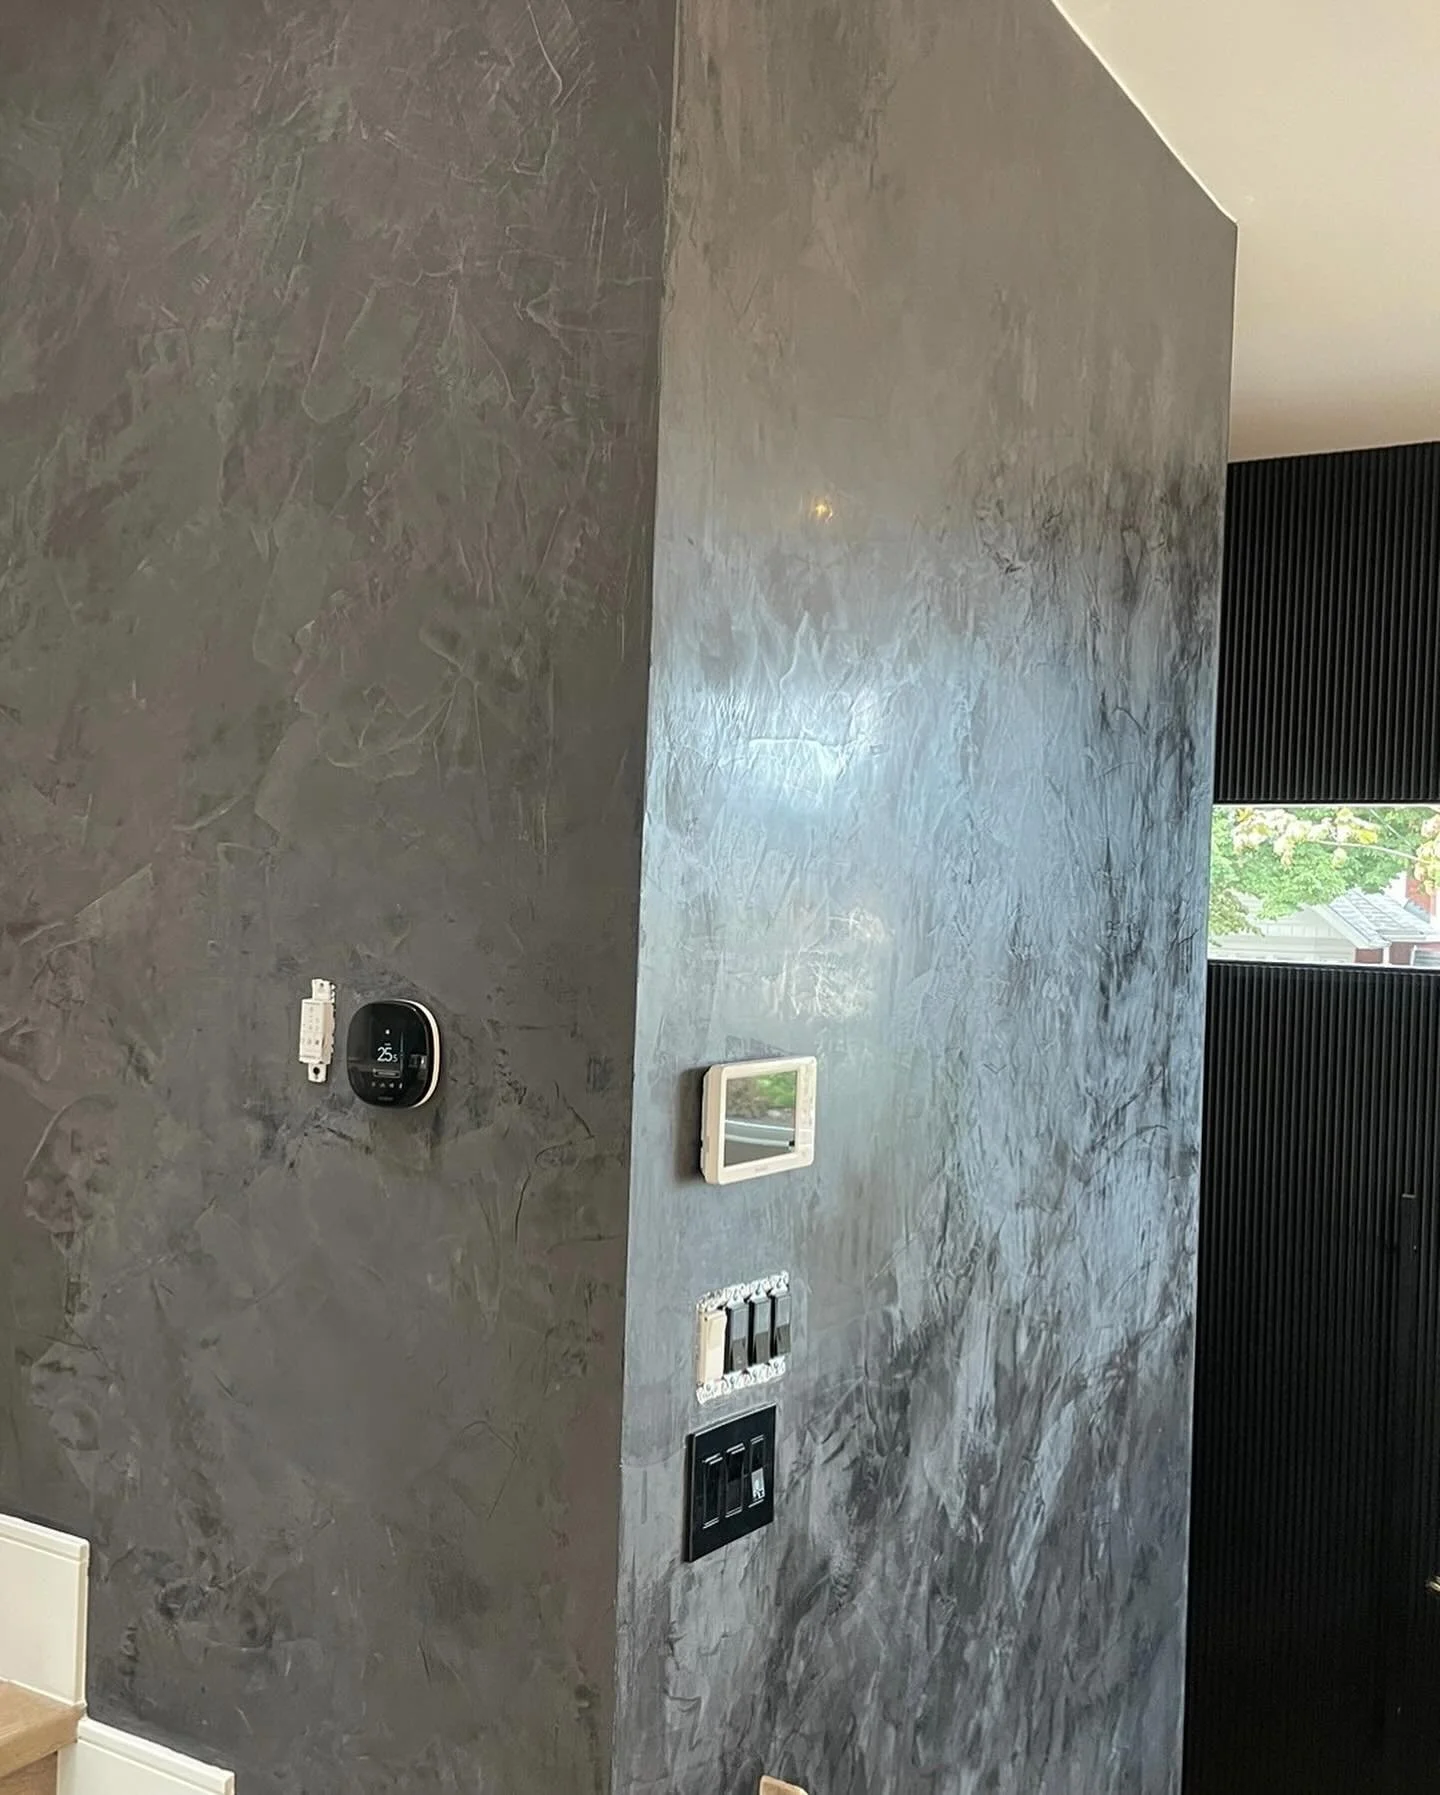
Venetian Plaster Painting
Venetian Plaster Painting
What it is Venetian plaster is a decorative wall finish made from slaked lime and fine marble dust, applied in multiple thin layers and burnished to create a smooth, polished surface with depth, subtle sheen and the look of natural stone. It can range from matte to high gloss and be manipulated to achieve textures, veining and colour variation that resemble marble, travertine or soft suede.
Benefits
Aesthetic depth: Layers and burnishing produce natural-looking veining and luminosity not possible with ordinary paint.
Durability: Properly applied and sealed, Venetian plaster is hard-wearing and resistant to minor scuffs.
Breathability: Lime-based plasters allow moisture to exchange, reducing the risk of trapped condensation on masonry and older buildings.
Low VOC options: Traditional formulations can be low in volatile organic compounds when modern, natural materials are used.
Customization: Pigments, application techniques and finishes allow for a wide range of looks from classic marble to contemporary satin or metallic effects.
Common finishes and styles
Polished (High-gloss): Deeply burnished for a mirror-like, reflective finish that emphasizes depth and colour variation.
Satin/Matte: Less burnish, softer appearance with subtle sheen and texture.
Marmorino: A refined marble-like finish with mild veining and smooth surface.
Scagliola: An imitation marble technique that can reproduce complex veining and layered stone effects.
Textured Venetian: Intentional trowel marks or rougher finishes for rustic or contemporary looks.
Typical applications
Feature walls and reception areas
Accent panels and focal points
Ceiling finishes in formal spaces
Fireplace surrounds and columns
Commercial spaces where a premium aesthetic is desired
Process overview
Surface preparation: Substrate must be clean, dry and sound. Repair cracks, fill holes and install a suitable base coat or primer. Plaster adheres best to properly prepared drywall, cement board or lime-suitable substrates.
Base coat: Apply one or more base coats to level the surface and establish adhesion.
Layering: Multiple thin layers of tinted or neutral plaster are applied with a stainless steel trowel. Each layer is allowed
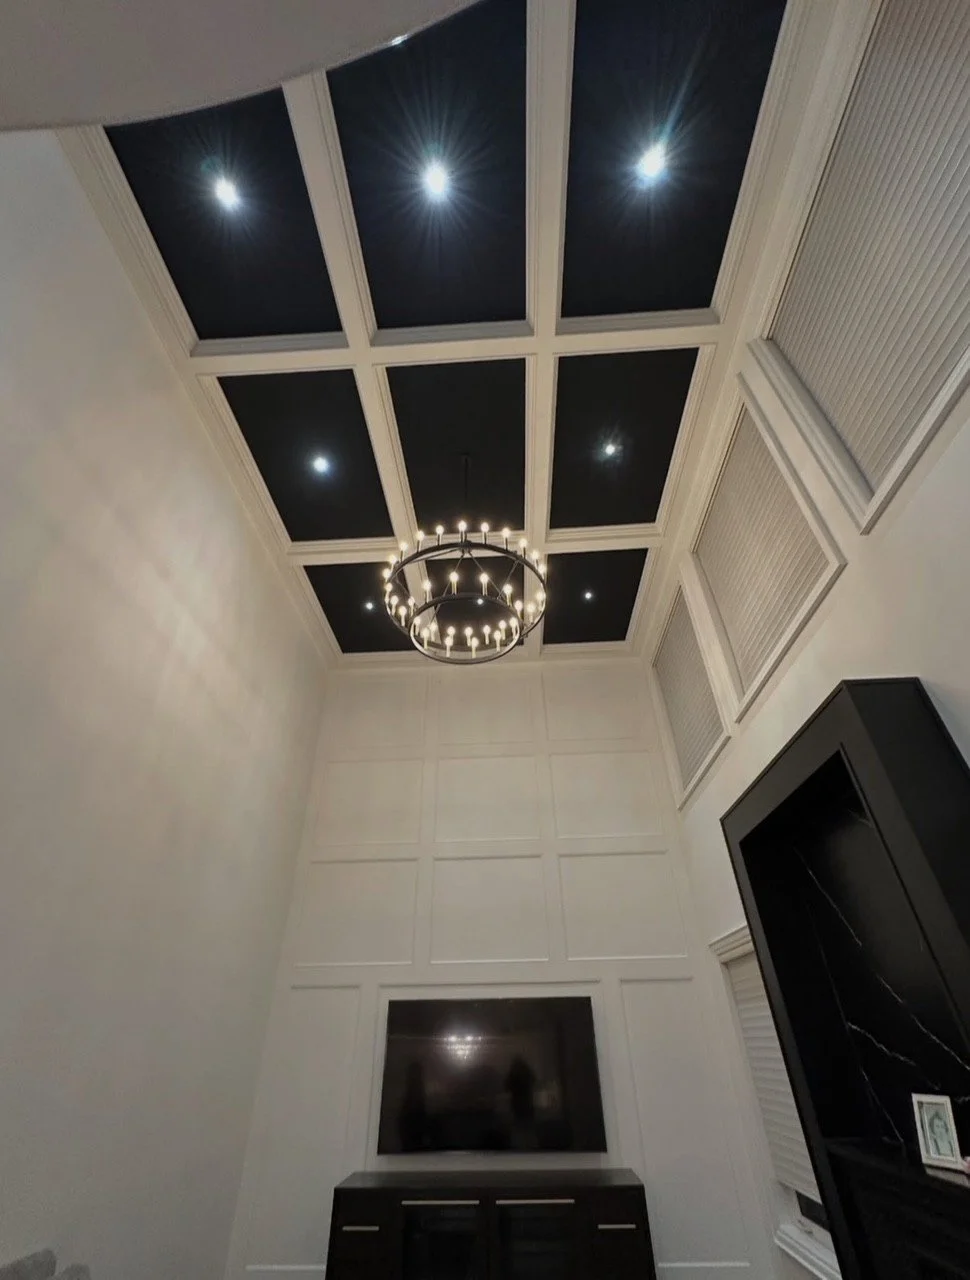
High Ceiling Painting
High ceilings add drama and light to a space, but they also present unique challenges for painting. Proper preparation, the right tools, and experienced techniques ensure a safe, efficient job and a flawless.
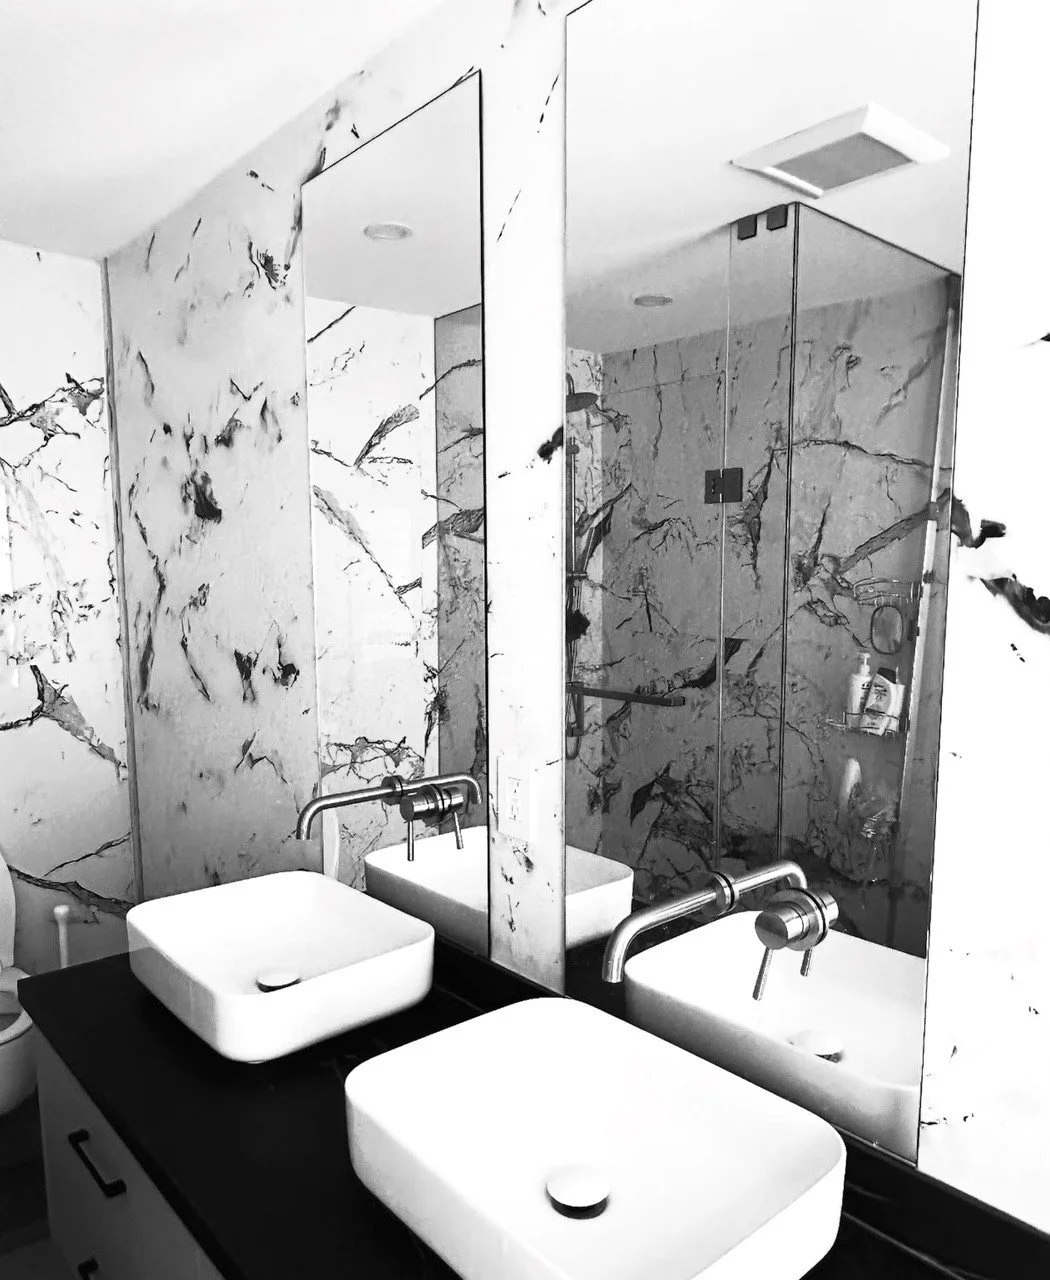
Residential Washroom Painting
Residential Interior Washroom Painting
A well-executed washroom paint job transforms a bathroom’s atmosphere, improves moisture resistance, and increases the home’s value. This overview covers planning, surface preparation, paint selection, application techniques, and finishing touches for residential interior washroom painting.
Planning and Preparation
Assess the space: Note size, ventilation, existing finishes, and areas prone to moisture (shower, tub surrounds, ceilings).
Colour selection: Choose lighter colours for small spaces to maximise perceived size and brightness. Consider warm neutrals for a calming feel, cool tones for a spa-like atmosphere, or high-contrast accents for modern looks.
Sheen choice: Use paint formulated for bathrooms. Recommended sheens are semi-gloss or satin for walls, and high-gloss for trim and cabinetry where extra durability is needed. Flat or matte should be avoided in high-moisture zones.
Ventilation and timing: Ensure good ventilation during and after painting. Plan work when humidity is lower to promote proper drying and curing.
Surface Preparation
Clean thoroughly: Remove soap scum, mildew, oils and dust. Use a mild detergent or trisodium phosphate (TSP) solution for tough grime, followed by a clear-water rinse.
Address mould and mildew: Treat affected areas with a mould-killing solution, allow to dry fully, and correct underlying moisture issues (vent fan, caulking, leaks).
Repair surfaces: Fill cracks and holes with an appropriate filler, sand smooth, and replace any damaged drywall or trim. For water-damaged areas, use moisture-resistant drywall or backerboard where applicable.
Prime: Apply a high-quality primer suited to the substrate and condition. Use a stain-blocking primer over water stains or tannin bleed, and a bonding primer on glossy tiles or previously coated surfaces.
Paint Selection
Bathroom-grade paints: Select paints labelled for bathrooms or kitchens; these contain mildew inhibitors and handle humidity better.
Low-VOC options: Choose low-VOC or zero-VOC formulas for indoor air quality, especially in small washrooms.
Colour considerations: Test small sample patches under the bathroom’s lighting (natural and artificial). Consider how reflective surfaces, mirrors, and fixtures affect perceived colour.
Application Techniques
Cut-in first: Use angled brushes for clean edges around ceilings, trim, fixtures, and tiles.
Roll efficiently: Use a short- or medium-nap roller for smooth walls; denser naps are better for lightly textured surfaces. Apply consistent pressure and maintain wet edges to avoid lap marks.
Multiple coats: Expect two coats for even coverage; allow recommended drying time between coats. Apply additional coat over stained or deep-coloured walls.
Paint ceilings separately: Consider painting the ceiling with a moisture-resistant flat or low-lustre finish designed for bathrooms.
Trim, Doors and Cabinetry
Clean and sand trim and doors; use a deglosser on glossy finishes if sanding is impractical.
Use an appropriate primer and a durable finish paint (satin or semi-gloss) that resists scuffs and moisture.
For cabinetry, consider a conversion varnish or a specially formulated cabinet paint for long-lasting results.
Tile and Shower Areas
Avoid painting directly on shower tile where possible; if necessary, use a specialty tile paint and ensure thorough cleaning, priming, and sealing.
Consider replacing or reglazing tiles for best durability in high-moisture wet zones.
Caulking and Sealing
Replace old caulk around tubs, sinks, and trim with a silicone or silicone-acrylic caulk rated for bathrooms.
Seal edges and trim to prevent moisture penetration into walls and joints.
Ventilation and Drying
Run exhaust fans during and after painting until paint is fully cured. Open windows when practical to aid drying.
Humidity control: Use a dehumidifier if needed to speed curing and reduce mould risk.
Maintenance and Care
Clean painted surfaces with mild, non-abrasive cleaners; avoid harsh chemicals that break down mildew-resistant finishes.
Touch up chips and scuffs promptly; keep leftover paint for future repairs.
Inspect vents, caulking, and grout periodically to prevent moisture damage.
Hiring Professionals
Verify credentials: Check references, insurance, and examples of previous bathroom work.
Obtain itemised quotes: Ensure quotes cover prep, primer, number of coats, materials, and clean-up.
Warranty and guarantees: Understand any workmanship warranty and the paint product warranty.
Summary Residential washroom painting requires careful attention to moisture management, surface preparation, and product selection. Proper primers, bathroom-grade paints, good ventilation, and meticulous application produce durable, attractive results that protect surfaces and enhance the space’s appearance.
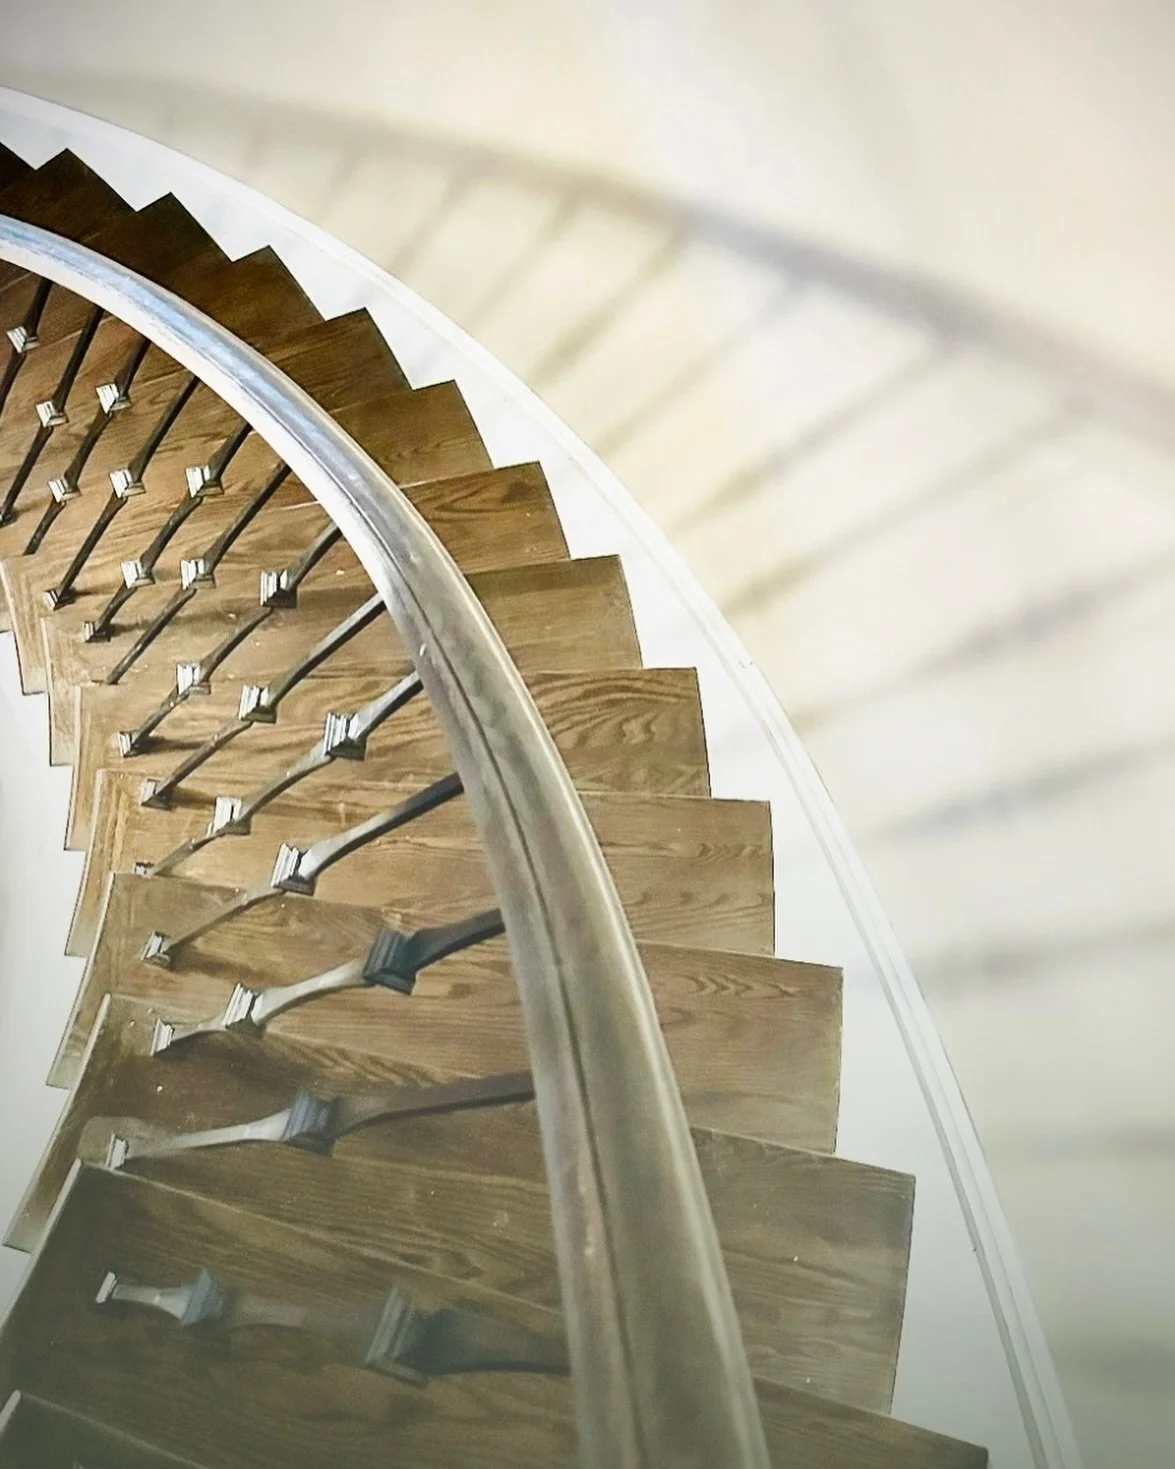
Residential Stairway Painting
Overview
Staining residential stairways transforms worn or plain wood into a focal point that complements your home’s interior. Proper staining enhances durability, highlights natural grain, and coordinates stairs with flooring, trim, and cabinetry.
When to Stain
New wood: Apply stain before final installation or immediately afterward to ensure even absorption and colour.
Worn or faded finish: Re-stain when finish shows signs of wear, uneven colour, or surface damage.
Renovation or style change: Staining is an efficient way to update stair appearance without replacing components.
Preparation Steps
Clean: Remove dust, dirt, and grease with a mild detergent solution. Allow wood to dry completely.
Strip or sand: For previously finished stairs, strip old finish if necessary, or sand through the finish to bare wood for consistent absorption. For raw wood, sand smooth with progressively finer grits (start ~80–100, finish 120–180).
Repair: Fill holes, gouges, or nail holes with wood filler that matches the wood species. Sand smooth after drying.
Mask and protect: Use painter’s tape to protect risers, walls, and adjacent flooring. Cover surrounding areas with drop cloths.
Condition (optional): Apply a wood conditioner for softwoods or blotchy-prone species (pine, alder, birch) to promote even stain absorption.
Choosing Products
Stain type:
Oil-based: Deeper penetration, longer working time, richer tones; dries slower and has stronger odour.
Water-based: Low odour, faster drying, easier cleanup, clearer colour that won’t amber over time.
Gel stains: Thicker, good for vertical surfaces or when covering uneven absorption.
Sheen and topcoat:
Use a durable topcoat suitable for high-traffic areas. Polyurethane (oil- or water-based) and catalyzed varnishes are common.
Choose finish level: satin/low sheen hides wear; semi-gloss and gloss are easier to clean but show scratches.
Colour selection:
Test samples on spare stair treads or scrap wood. View samples in different light conditions and with surrounding finishes.
Application Process
Apply stain:
Brush, rag, or pad-apply depending on product and desired effect. Work with the grain.
Wipe off excess after a few minutes for an even tone. Longer dwell times produce darker shades.
Allow adequate drying between coats per manufacturer instructions.
Light sanding:
Between coats, lightly sand with fine-grit (220) paper to remove raised grain and ensure adhesion; remove dust thoroughly.
Topcoat:
Apply at least two coats of durable clear finish for stairs; high-traffic areas may need three. Follow recommended drying times.
For water-based polyurethanes, provide good ventilation to accelerate curing.
Practical Tips
Work methodically: Stain and finish from top to bottom and from one end to the other to avoid tracks and drips.
Ventilation and safety: Use masks and adequate ventilation. For oil-based products, take precautions with rags (risk of spontaneous combustion—store in metal container or soak in water).
Timing: Plan for multiple days—staining and topcoats need adequate curing time before heavy use.
Edge and nosing care: Pay attention to bullnose edges and nosings for uniform appearance and extra wear protection.
Non-slip: Consider adding a non-slip additive to topcoat on treads for safety.
Maintenance
Clean regularly with a damp cloth and a pH-neutral cleaner.
Address scratches and scuffs with touch-up kits (stain markers, coloured fillers) or spot-sand and recoat as needed.
Recoat schedule: Depending on traffic, inspect annually and refresh clear coats every 3–7 years.
When to Hire a Professional
Complex staircases (curved, open risers, ornate balustrades).
Structural repairs, significant refinishing of heavily worn or stained wood, or when you require factory-quality colour matching.
If you prefer fast, low-odour water-based systems applied by experienced pros for minimal disruption.
Estimated Costs (Canada)
DIY materials: Stain, topcoat, sandpaper, tape, brushes/pads — approximately CAD 100–400 depending on product quality and stair count.
Professional: Labour and materials typically range from CAD 600 to CAD 3,500+ depending on staircase complexity, number of treads/risers, and product choices.
Conclusion Staining residential stairways is a cost-effective way to refresh interior aesthetics and protect high-use surfaces. With proper preparation, product selection, and application, you can achieve a durable, attractive finish that enhances your home’s value
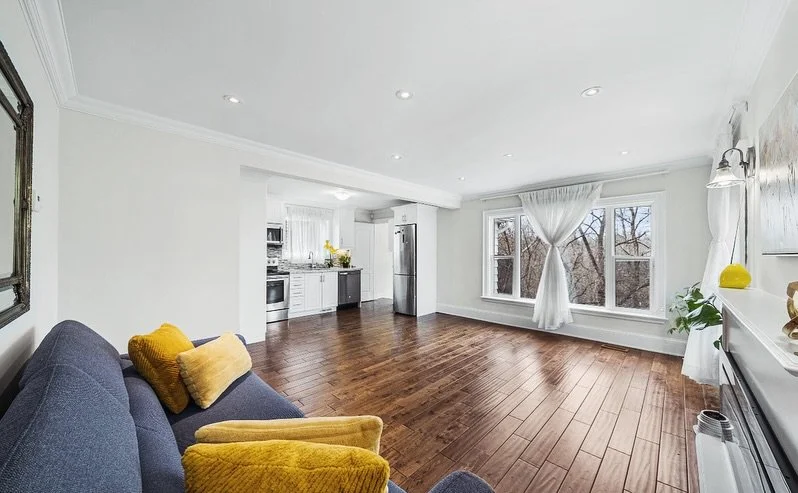
Professional Designer-led Interior Painting
Professional Interior Painting
Professional interior painting transforms rooms quickly and cost-effectively, improving appearance, protecting surfaces and increasing property value. A well-executed paint job requires careful preparation, quality materials and skilled application to achieve durable, uniform results with clean lines and consistent coverage.
What a professional interior paint service includes
Initial consultation and colour advice: Assessing lighting, room function and existing finishes; recommending paint types, sheens and colour palettes suited to the space.
Surface inspection and preparation: Identifying and repairing cracks, holes, peeling paint, water damage and mould. Sanding, patching, caulking gaps and priming as required to ensure adhesion and a smooth finish.
Protecting the space: Moving or covering furniture, protecting floors and trim with drop cloths and tape, and isolating HVAC vents and electrical fixtures as needed.
Professional application: Using brushes, rollers and sprayers appropriate to the surface and paint. Applying primer where necessary, followed by the correct number of topcoats for full coverage and even sheen.
Clean-up and final inspection: Removing protective coverings, reattaching hardware and switch plates, cleaning up debris and inspecting the finish with the client to address touch-ups.
Benefits of hiring professionals
Time savings: Experienced teams work efficiently and coordinate multiple rooms, cuts and trim work while minimising disruption.
Superior finish: Professionals achieve smoother walls, sharper lines around trim and windows, and consistent sheen across surfaces.
Correct product choice: Experts select paints with the right durability, washability and VOC levels for the room (e.g., low-VOC options for bedrooms and living spaces, mildew-resistant paints for bathrooms).
Long-term protection: Proper preparation and application extend the life of the paint and help prevent issues such as chipping, blistering and premature wear.
Warranty and accountability: Reputable painters often provide workmanship guarantees and professional insurance, offering peace of mind.
Choosing colours and finishes
Sheen selection: Flat and matte hides imperfections well and is good for low-traffic areas; eggshell and satin are versatile for living areas and hallways; semi-gloss and gloss are ideal for trim, doors and high-touch surfaces for easy cleaning.
Light and space: Lighter colours make small rooms feel larger and brighter; darker tones add depth and a cosy feel but require careful lighting consideration.
Undertones and coordination: Test large swatches under different lighting — natural and artificial — to verify undertones and how colours coordinate with flooring, cabinetry and fixtures.
Common areas of focus
Living rooms and bedrooms: Emphasis on comfort, colour psychology and durability.
Kitchens: Use washable, stain-resistant paints; consider semi-gloss on cabinets and trim.
Bathrooms and laundry rooms: Use mildew-resistant formulations and proper ventilation.
Trim, doors and mouldings: Require different sheen and often their own primer for adhesion and durability.
Accent walls and textured finishes: Professionals can create feature walls, faux finishes or textured applications for visual interest.
Preparation checklist for homeowners
Declutter and move small items: Clear walls and shelves, and remove or protect valuables.
Communicate preferences: Share sample swatches, inspiration photos and any areas of concern with the painting team.
Arrange access: Ensure painters can reach all rooms, and discuss scheduling to minimize disruption.
Confirm safety: Notify painters of pets, children and any health sensitivities; request low- or zero-VOC options if needed.
Cost considerations
Pricing factors: Square footage, number of coats, surface condition, prep work, type of paint, trim complexity and labour intensity.
Estimates and contracts: Request written quotes detailing scope, materials, timeline and warranty; avoid significantly low bids that omit necessary prep or use inferior products.
Final tips
Insist on a walk-through: Review the scope and expected finish before work begins and again on completion to confirm satisfaction.
Keep paint records: Note colours, brands and sheen used for future touch-ups or matching.
Schedule seasonal projects: Spring and early fall often offer optimal conditions for drying and fewer scheduling conflicts.
A professional interior paint job protects surfaces, refreshes living spaces and provides a measurable return on investment when done correctly. Choosing experienced painters who prioritise preparation, quality materials and clear communication yields the best, longest-lasting results.
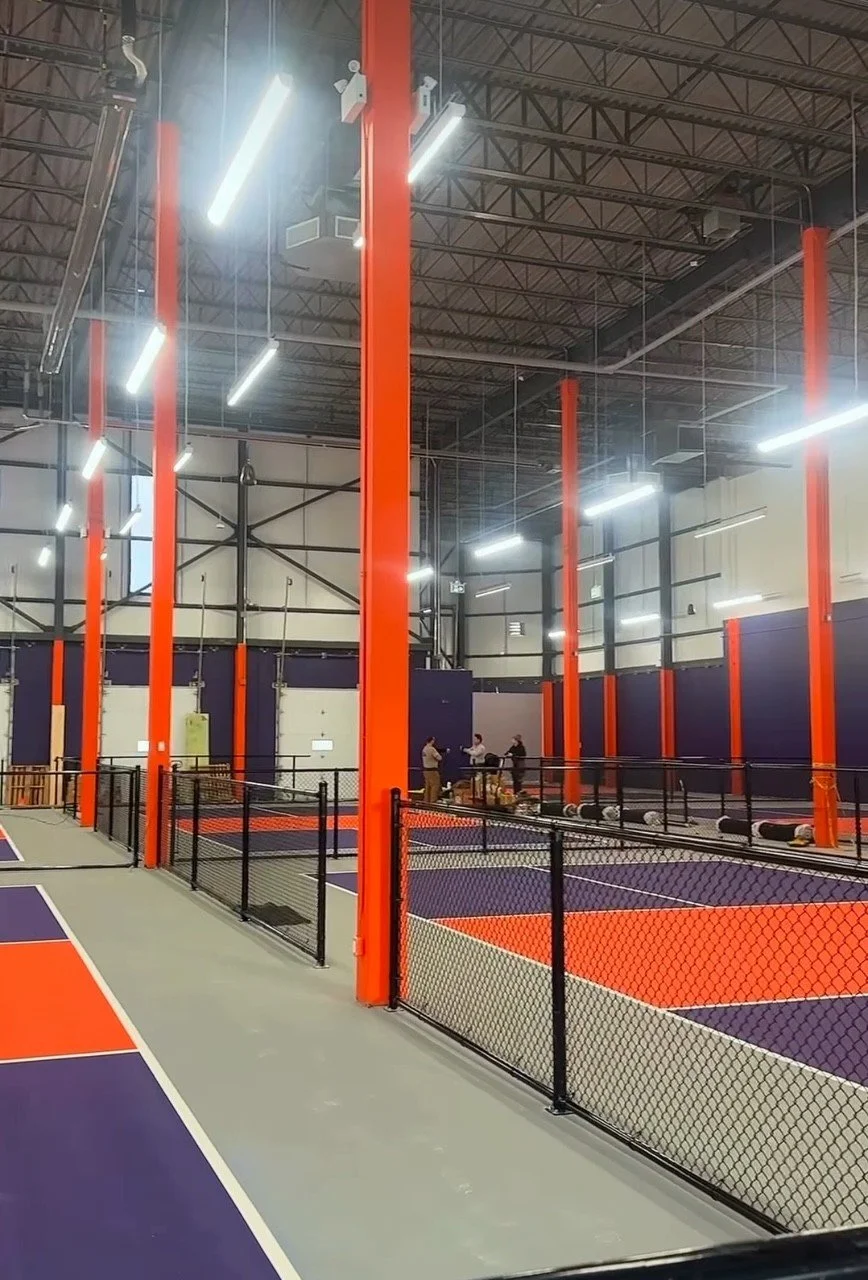
PicklePlex Aurora Industrial Painting
Sports Complex Painting
A professional paint job in a sports complex does more than refresh surfaces — it improves safety, durability and visual identity while reducing long-term maintenance costs. This guide covers planning, surface preparation, coating selection and application methods specific to sports facilities such as gyms, arenas, natatoriums and multi-use community centres.
Project planning and goals
Define facility needs: courts, walls, ceilings, seating, locker rooms, corridors, exterior facades and signage. Note high-traffic and impact zones (basketball courts, weight rooms, entryways).
Establish performance goals: abrasion resistance, slip resistance, chemical and moisture resistance, vapour barrier properties, UV stability, and ease of cleaning.
Schedule around facility use: arrange night or off-season work, phased closures, or temporary relocations to minimise disruptions to teams and programs.
Budget and lifecycle: include costs for primers, topcoats, line painting, floor coatings, masking, labour, drying time and future recoats. Consider total cost of ownership — higher-quality coatings often extend service life and lower maintenance frequency.
Surface assessment and preparation
Inspect substrates: concrete, wood, steel, masonry, drywall and synthetic sports surfaces (vinyl, polyurethane). Identify cracks, spalls, delamination, rust, efflorescence and contamination (oil, grease, salt).
Concrete floors: test moisture content and pH. Ensure slab dryness and compatibility with moisture-tolerant systems if required. Remove old coatings using mechanical methods (diamond grinding, shot blasting) to achieve profile and adhesion. Repair cracks and spalls with suitable patching mortars and allow proper cure.
Wood floors: assess for hardness, moisture, loose boards and finish wear. Sand to bare wood where necessary, replace damaged boards and ensure secure fastening.
Metal and steel: remove rust, millscale and existing failed coatings by abrasive blasting or mechanical cleaning. Apply appropriate primers to prevent corrosion.
Walls and ceilings: clean, repair drywall and concrete, and prime porous or patched areas to ensure uniform topcoat appearance.
Moisture and ventilation: confirm HVAC and dehumidification for proper curing, especially in natatoriums and cold climates. Guard against moisture drive from slabs.
Coating selection
Floor systems:
Acrylic sports paints: economical, easy to recoat, suitable for gymnasium hardwood (clear or pigmented) and for marking lines. Less durable than resinous systems in high-impact areas.
Polyurethane (one- or two-component): excellent abrasion and chemical resistance, low VOC options available. Common for both wood and concrete surfaces when longer life and gloss retention are required.
Epoxy floor systems: durable, chemical resistant, and suitable for concrete. Use slip-resistant aggregates in high-traffic zones. Beware of UV yellowing for exterior or sunlit areas unless UV-stable topcoat is used.
Polyaspartic/polyurea coatings: fast curing, high abrasion resistance, and can be applied in thin layers with quick return-to-service — useful for tight schedules.
Sport-specific cushioned systems: multi-layer polyurethane formulations designed for shock absorption, ball bounce and player safety for hardwood replacements or overlays.
Line marking and logos: use factory-tinted, compatible paints for crisp lines and colour-matching. Thermoplastic lines or tape can be used for heavy-wear areas.
Walls and ceilings: select washable, mildew-resistant paints for locker rooms and natatoriums. Use high-build coatings on cinderblock or masonry to hide imperfections. Use anti-graffiti topcoats in public areas.
Exterior coatings: elastomeric or acrylic masonry systems for waterproofing and crack bridging; UV-resistant acrylics for metal panels; zinc-rich primers for steel.
Application best practices
Mock-up and testing: complete test patches for adhesion, colour, texture and slip resistance. Verify line layout and logo application with stakeholders.
Temperature and humidity controls: abide by manufacturer limits for ambient, surface and substrate temperatures. Avoid application during precipitation or extreme conditions.
Priming and bonding: use primers tailored to substrate and topcoat chemistry. Ensure full cure before applying subsequent coats.
Layer build and thickness: follow specified mil thickness and coverage rates. Uniform build prevents premature failure.
Slip resistance: integrate slip-resistant additives, textured coatings or broadcast aggregates in key areas (entrances, ramps, locker rooms) without compromising ball performance in play areas.
Masking and protection: protect non-target surfaces, seating and equipment. Use dust control during surface preparation to avoid contaminating finished coatings.
Safety, compliance and environmental considerations
VOC and emissions: choose products that meet local VOC regulations and allow safe occupancy post-application. Provide Material Safety Data Sheets (MSDS) and ensure proper ventilation during
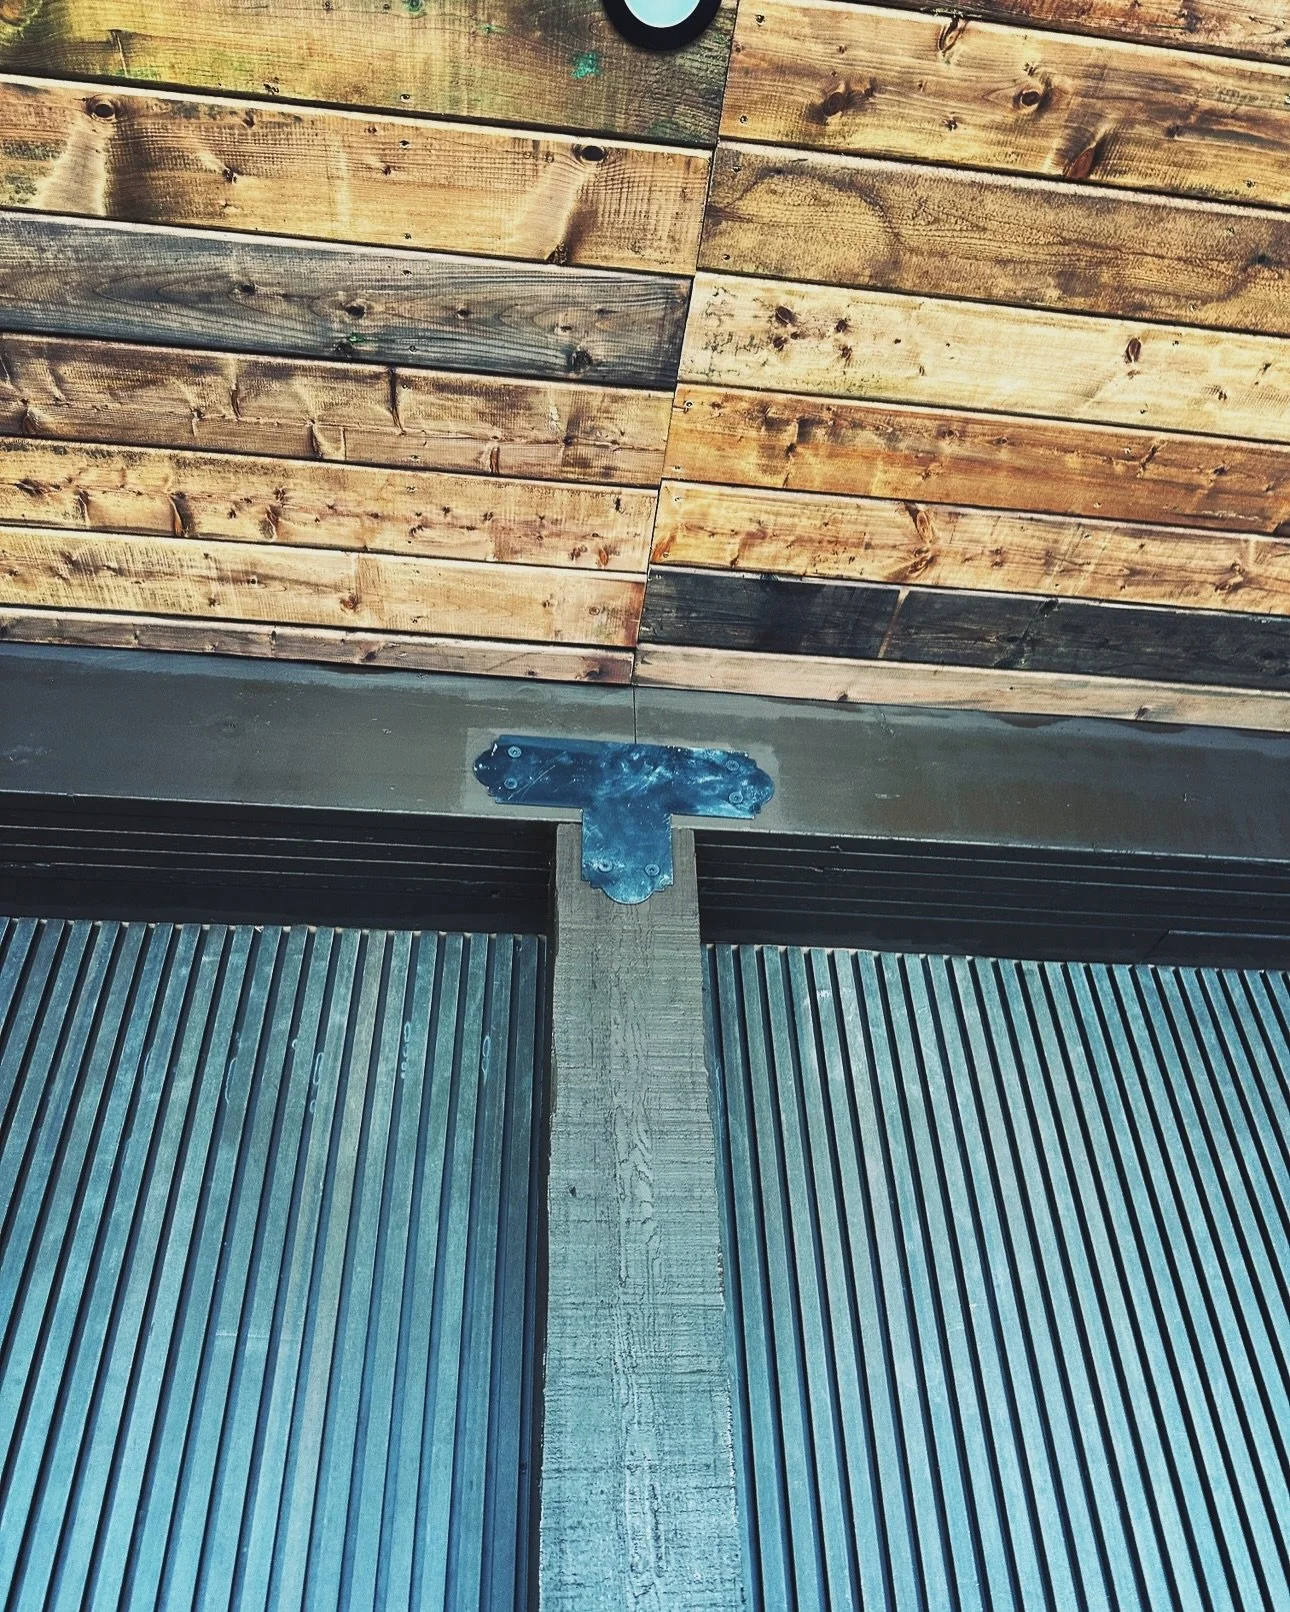
Closets Before / After
Backyard Staining
Why stain your backyard wood?
Protects wood from moisture, UV rays and mildew, extending the life of decks, fences, pergolas and outdoor furniture.
Enhances natural grain and colour, improving curb appeal.
Easier maintenance than painting — reapplication typically requires less prep.
Types of stains
Transparent: Lets natural grain show through; minimal colour change; least UV protection.
Semi-transparent: Adds subtle colour while still showing wood texture; good balance of appearance and protection.
Semi-solid: More pigment, hides some grain; provides
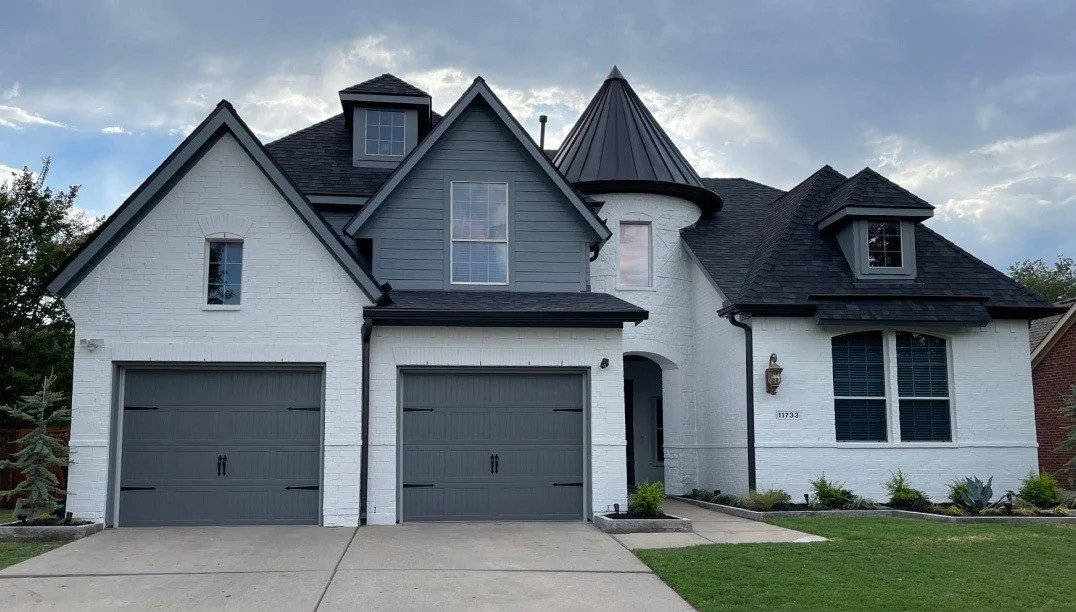
Luxury Exterior Painting
Luxury Exterior Home Painting
Creating a truly luxurious exterior begins with an approach that blends premium materials, meticulous preparation, and refined design sensibilities. Luxury exterior home painting transforms curb appeal, protects your investment, and communicates timeless style. Below are the key components and considerations when planning a high-end exterior paint project.
Vision and design
Architectural assessment: Begin by evaluating the home’s style—Victorian, Modern, Colonial, Craftsman—and identify features to highlight (trim, moldings, gables, shutters, doors).
Colour strategy: Choose a sophisticated palette that complements roofing, stonework, landscaping and neighbourhood context. Consider layered neutrals, deep accent hues for doors or shutters, and coordinated trim tones. Test full-scale samples on different elevations and observe them at various times of day.
Finishes and accents: Select matte, eggshell, satin or low-lustre finishes depending on surface and desired effect. Metallic or textured accents can be used sparingly for gates, address plaques or carved elements.
Materials and product selection
Premium exterior paints: Use 100% acrylic or hybrid formulations engineered for Canadian climates—superior adhesion, UV resistance, fade control, and flexible film formation to withstand freeze-thaw cycles.
Primer systems: High-performance primers (bonding, stain-blocking, rust-inhibiting) are essential for uniform coverage and long lifespan.
Specialty coatings: Stain repellents, elastomeric coatings for hairline cracks, and water-repellent finishes for masonry preserve appearance and integrity.
Accessories: High-quality caulk, backer rod, rust-resistant fasteners and breathable housewrap or moisture management layers.
Surface preparation
Inspection: Examine siding, trim, eaves, fascia, gutters, woodwork, and masonry for rot, rust, peeling, mildew or structural damage.
Repair and replacement: Replace rotten wood, tighten loose boards, repoint or seal masonry joints, treat metal for corrosion. Luxury results require addressing defects rather than simply painting over them.
Cleaning and stripping: Use soft washing or pressure washing at appropriate settings, chemical strippers where needed for old coatings, and sanding to feather edges of peeling paint.
Priming and sealing: Apply appropriate primers to bare wood, metal and patched areas to ensure uniform adhesion and hide tannin or stain bleed-through.
Craftsmanship and application
Skilled tradespeople: Hire painters experienced in high-end exterior work who understand substrate-specific techniques and detailed trim work.
Methods: Brush and roll for precise edges and texture control; spray for large, smooth surfaces followed by back-brushing to ensure adhesion. Multiple thin coats are preferable to one heavy coat.
Detailing: Masking and drop cloths, crisp cut lines at transitions, consistent stroke patterns, and careful treatment of architectural details define a luxury finish.
Weather windows: Paint during stable conditions—moderate temperatures, low humidity, and no imminent rain—to ensure proper cure and film formation.
Durability and maintenance
Warranty and maintenance plans: Choose products and contractors that provide clear warranties. Offer scheduled maintenance: inspections, touch-ups, cleaning, and recoat schedules to preserve the finish.
Seasonal considerations: In Canada, account for thermal expansion, ice and salt exposure. Use breathable masonry coatings on stone and brick to avoid trapped moisture.
Long-term care: Gentle washing to remove dirt and mildew, prompt repair of chips or exposed substrate, and protective treatments for metal and wood trim.
Sustainability and health
Low-VOC and zero-VOC options: Premium low-VOC formulations reduce odour and environmental impact without sacrificing durability.
Responsible disposal and recycling: Use waste-management practices for leftover paint, solvents and packaging. Minimise overspray and material waste.
Energy efficiency: Consider light-reflective finishes for warmer climates or insulated claddings under paint to improve thermal performance.
Cost considerations
Upfront investment: Luxury exterior painting costs more due to higher-grade materials, intensive preparation and skilled labour. Factor in repairs, scaffolding, scaffolding and specialty access for tall or complex façades.
Value return: A high-quality exterior paint project can increase resale value, extend the life of cladding and reduce long-term maintenance costs.
Project timeline and management
Planning phase: Colour selection, sample application and materials procurement typically take one to three weeks.
Execution: Depending on house size and scope, expect several days to several weeks. Allow time for repairs, primer and multiple finish coats, and appropriate cure times between coats.
Communication: A detailed proposal should specify materials, surface prep, warranty, timeline and staging to minimise disruption.
Final considerations A luxury exterior paint job is about more than colour—it's an integrated process combining architectural respect, premium materials, expert preparation and flawless application. When executed correctly, it delivers a striking, long-lasting finish
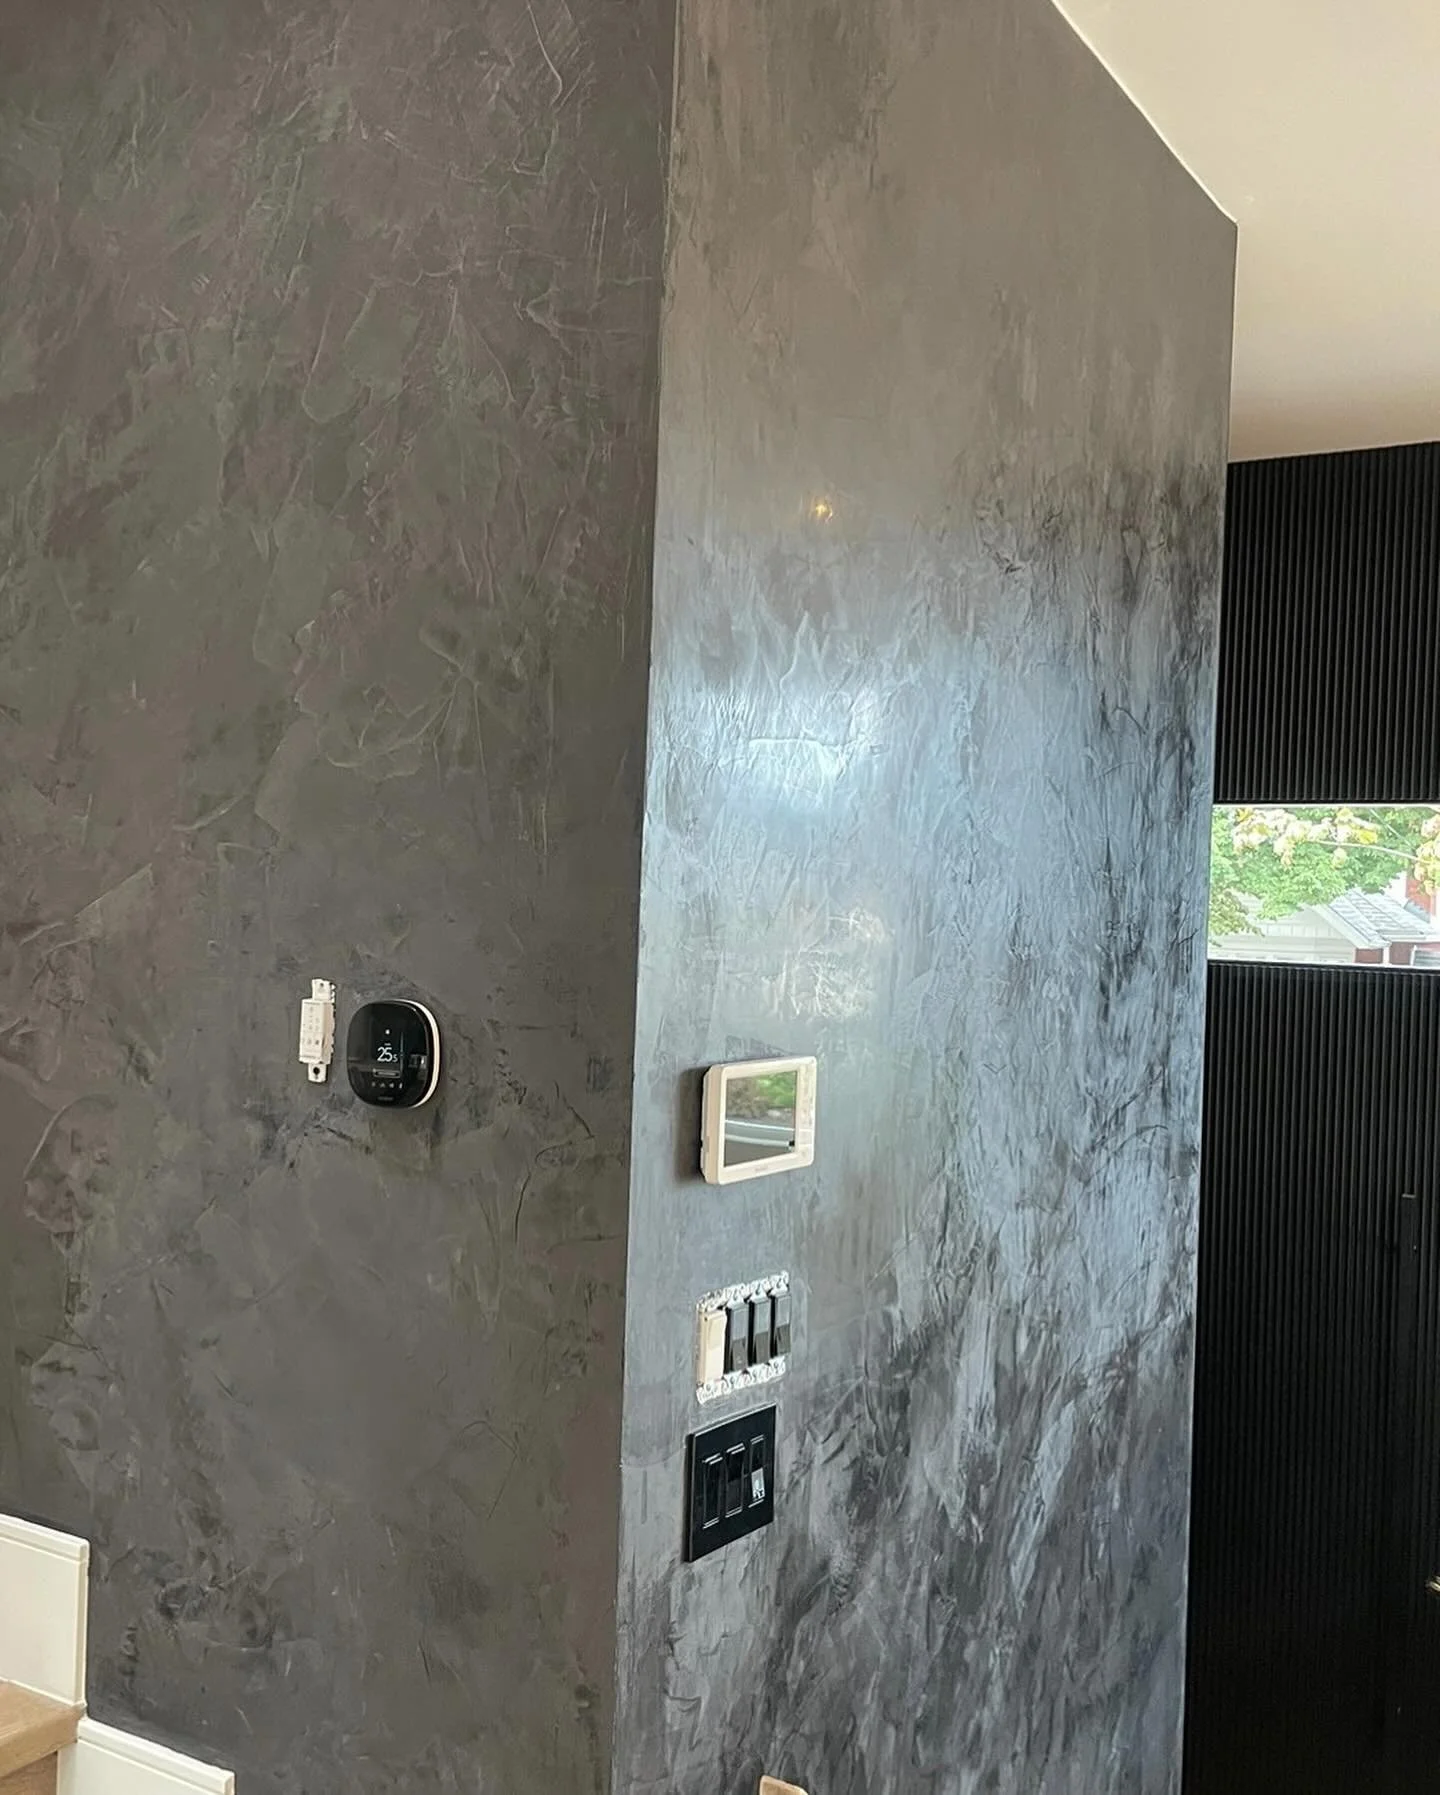
Venetian Plaster Interior Painting
Venetian plaster is a classic finishing technique that creates a smooth, polished surface with depth and subtle variation. It uses multiple thin layers of lime-based plaster, burnished to a satin or high-gloss sheen, and can mimic the look of natural stone such as marble. Ideal for feature walls, fireplaces, hallways and high-end interiors, Venetian plaster adds texture, luminosity and a timeless elegance to residential and commercial spaces.
Benefits
Luxurious appearance: Provides a refined, marble-like finish with depth and movement.
Durable and long-lasting: Properly applied and sealed, it resists cracking and wears well over time.
Breathable: Traditional lime-based plasters allow moisture transfer, reducing the risk of trapped moisture in older buildings.
Customizable: Available in a wide range of colours, sheens and textures—from smooth and polished to more rustic, troweled effects.
Low maintenance: Dust and dirt wipe away easily; re-polishing can refresh the surface if needed.
Typical Applications
Accent and feature walls
Entryways and foyers
Living and dining rooms
Bathrooms and powder rooms (when sealed appropriately)
Fireplaces and mantels
Commercial lobbies and boutique interiors
Materials and Tools
Venetian plaster compound (lime-based or acrylic-modified variants)
Trowel and stainless steel spatulas
Sanding pads or fine-grit sandpaper (for between coats if required)
Sealers/waxes or breathable protective topcoats
Primer suitable for substrate
Clean rags and mixing tools
Drop cloths and masking tape
Surface Preparation
Inspect substrate: Ensure walls are structurally sound, clean and free of loose paint, dust, grease or efflorescence.
Repair: Fill cracks and holes, sand rough spots and prime patched areas.
Prime: Apply a primer appropriate to the plaster type and substrate (e.g., masonry primer for concrete or gypsum primer for drywall). Some Venetian plaster systems recommend a coloured basecoat to enhance depth.
Ensure moisture levels are appropriate—avoid application on damp surfaces.
Application Overview
Basecoat: Apply one or more thin base layers with a stainless steel trowel, allowing recommended drying time between coats. Basecoat colours can be used to influence final tone.
Build-up layers: Apply additional thin layers, allowing partial drying and varying trowel direction with each pass to create depth and subtle texture. Layering is key to the final look.
Burnishing: Once sufficient layers are applied and dried to the manufacturer’s guideline, burnish with a clean trowel or polishing tool to compact the plaster and create a sheen. For higher gloss, continue burnishing progressively.
Distressing or antiquing (optional): For a more aged or varied look, lightly sand areas or apply a glaze/antiquing wash selectively.
Seal: Apply a breathable sealer, wax or protective topcoat depending on the product. In wet areas, choose a water-resistant finish rated for humidity.
Tips for Best Results
Test a sample: Always create a sample panel on-site to confirm colour, sheen and technique before committing to the entire space.
Work in small sections: Venetian plaster can be labour-intensive—working in manageable areas helps maintain wet edges and a consistent finish.
Practice technique: Trowel angle, pressure and speed affect the final appearance; practice on scrap board to develop the desired look.
Control environment: Avoid application in temperatures or humidity levels outside the manufacturer’s recommendations.
Choose the right product: Traditional lime plasters require different handling than acrylic-modified systems; select materials suited to the substrate and project needs.
Maintenance
Dust regularly with a soft cloth.
Clean gently with mild detergent and soft sponge for stains; avoid abrasive cleaners.
Re-wax or re-apply a protective coat if sheen diminishes over time.
Address chips or cracks promptly with spot repairs to prevent moisture ingress.
When to Hire a Professional Venetian plaster is an artisanal finish that relies on skillful trowel work and layering. For large areas, complex architectural details, high-visibility spaces, or when achieving a consistent, high-end finish is essential, hiring an experienced applicator is recommended. Professionals can also advise on the best product system for your substrate and climate, and provide warranty-backed installation.
Cost Considerations Costs vary depending on product type (traditional lime vs. acrylic), complexity of the finish, wall condition, and labour. Venetian plaster is typically more expensive than standard paint due to material costs and skilled labour time. Obtain multiple quotes and review examples of completed work before selecting a contractor.
Summary Venetian plaster transforms interiors with a durable, elegant finish that adds depth, refinement and visual interest. Proper preparation,
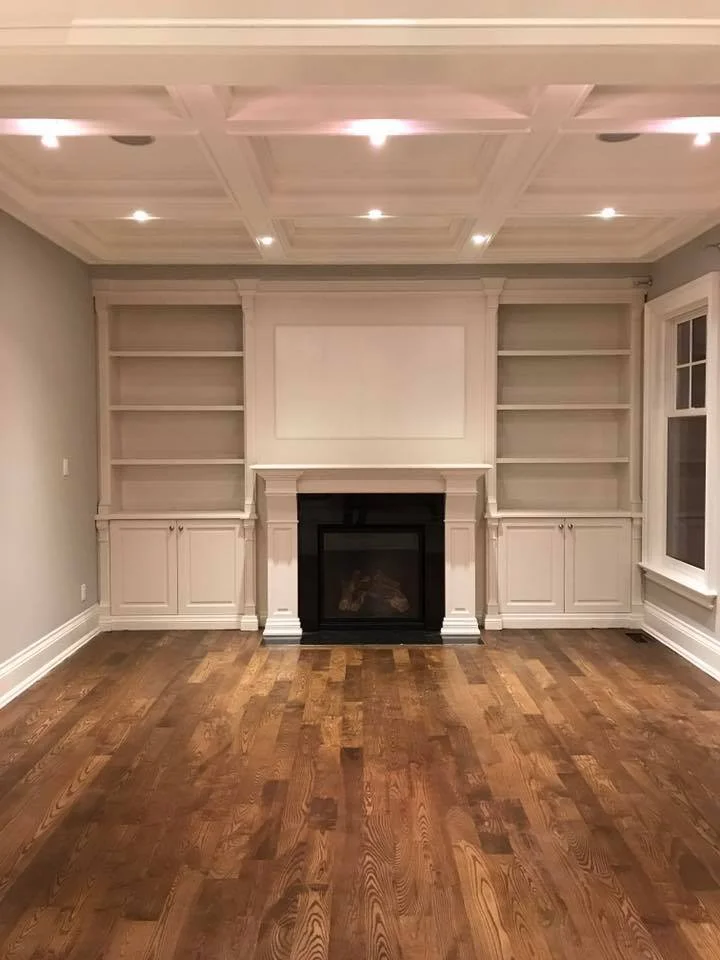
Living Room Painting
When people think about commercial painting, they often focus on color. However, the real value of professional industrial painting lies in its ability to completely transform a space, improve durability, and create an environment that reflects a company's professionalism. This before-and-after project is a perfect example of that transformation in action.
At first glance, the original space featured exposed concrete block walls, unfinished surfaces, and a purely functional appearance. While structurally sound, the warehouse lacked the clean, polished look many businesses seek when preparing a facility for operations, storage, manufacturing, or customer-facing activities.
The transformation began with thorough surface preparation, a critical step in any commercial painting project. Concrete block walls require specialized coatings and proper preparation to ensure long-lasting performance and even coverage. Once prepared, the walls were coated in a modern two-tone color scheme featuring deep charcoal and black finishes that immediately elevated the space.
The results are dramatic.
The newly painted walls create a cleaner and more organized environment while enhancing the architectural features of the building. The darker lower section helps conceal everyday wear and tear common in industrial settings, while the lighter upper section maintains brightness and openness throughout the warehouse. This practical design approach combines aesthetics with functionality, making it ideal for commercial and industrial facilities.
The freshly coated floor further contributes to the professional appearance. The seamless grey finish improves both durability and maintenance, creating a surface that is easier to clean and better suited for heavy traffic and equipment use. Together, the floor and wall finishes create a cohesive appearance that gives the facility a modern, ready-for-business feel.
One of the most important benefits of projects like this is the impact on perception. Whether viewed by employees, customers, vendors, or potential tenants, a well-maintained facility communicates professionalism, pride, and attention to detail. A clean, freshly painted workspace can improve employee morale, enhance safety visibility, and contribute to a more productive working environment.
Industrial and commercial buildings often represent significant investments, and protective coatings help preserve those investments by shielding surfaces from moisture, dirt, impact, and everyday wear. What might appear to be a cosmetic upgrade is actually a long-term maintenance strategy that extends the life of a facility.
This project demonstrates how professional commercial painting can turn an unfinished industrial unit into a polished and functional workspace. The difference between the before and after images is more than just paint. It is a transformation that improves appearance, protects assets, and creates a space ready to support business growth for years to come.
For warehouses, distribution centers, manufacturing facilities, and commercial units throughout the Greater Toronto Area, a professional painting project remains one of the most cost-effective ways to enhance both the appearance and value of a property.
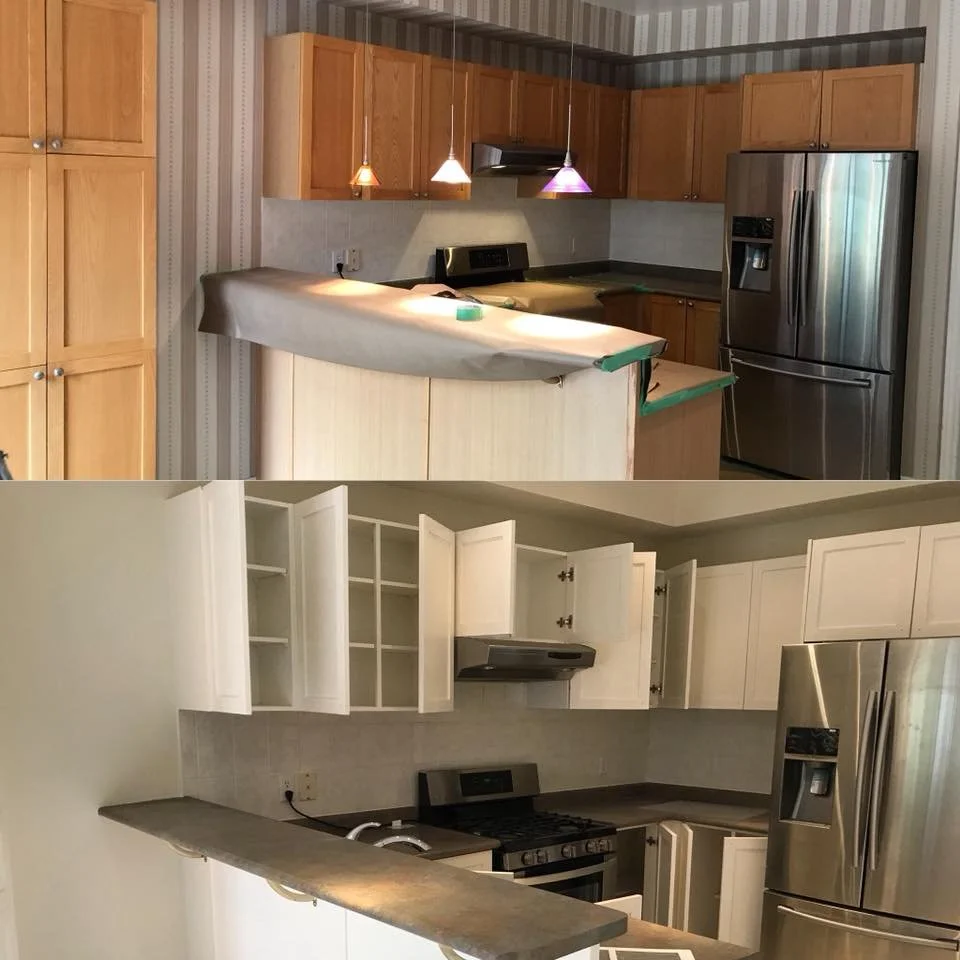
Before / After Kitchen Painting
Before and after: Kitchen painting
Before
Walls and trim show years of wear: scuffs, grease stains near the stove, and faded areas from sunlight.
Cabinets look dated or mismatched. Original finishes are dulled, hardware may be tarnished or loose.
Colour palette is uneven — dark or busy tones making the space feel smaller and less inviting.
Ceilings and crown moulding have accumulated dust and minor cracks; paint is peeling in spots near moisture sources.
Doors and window frames have nicks and chipped paint.
Overall impression: cluttered or tired, lacking cohesion and brightness, with visible surface imperfections.
After
Walls refreshed with a clean, durable finish that resists grease and is easy to wipe down. Lighter, neutral colours open up the space and reflect more natural light.
Cabinets repainted or refinished for a uniform, modern look — popular choices include soft whites, greys, navy, or muted greens. New or polished hardware completes the update.
Trim, moulding, and ceilings repainted in crisp white or coordinating tones for a finished appearance
Exterior Residential Painting
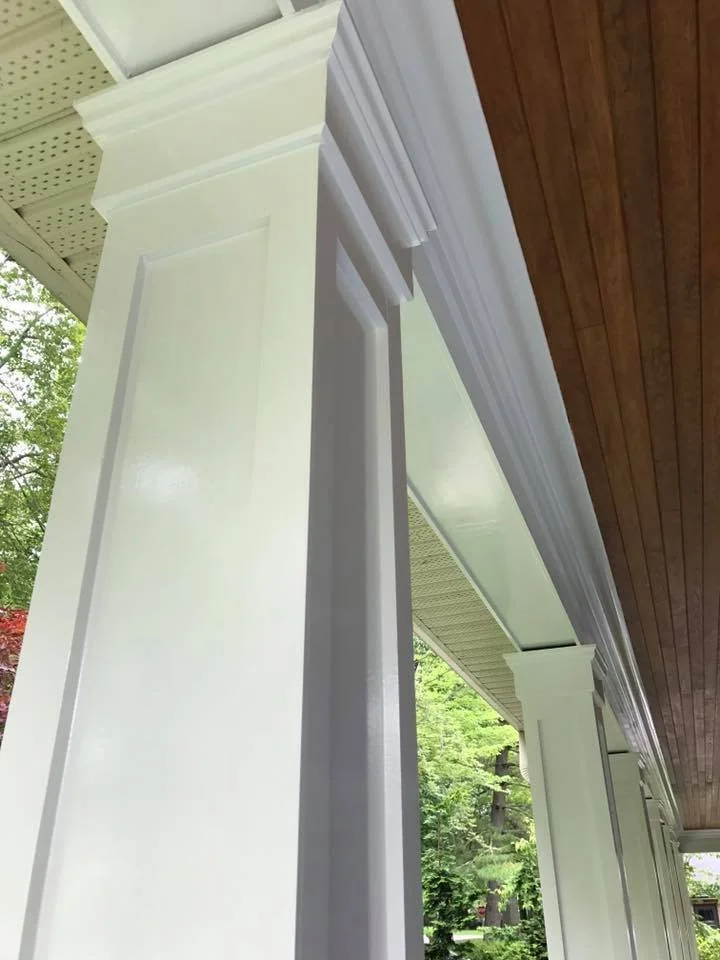
Exterior Painting and Staining
Overview Exterior painting and staining protect and enhance the look of homes and buildings while extending the life of siding, trim, decks, fences and other outdoor surfaces. Properly executed exterior finishes resist moisture, UV damage, mould and insect attack, and improve curb appeal and property value.
When to repaint or restain
Fading or chalking: Colours look dull or powdery when you run your hand over a painted surface.
Peeling or blistering: Paint has lost adhesion and is lifting from the substrate.
Water damage or rot: Staining or painting can’t fix structural rot — replace damaged wood first.
Mildew or mould growth: Dark streaks, spots or fuzzy growth indicate microbiological issues that must be cleaned prior to refinishing.
Weathering of stain: Transparent or semi-transparent stains on decking and fences often need reapplication every 1–3 years; solid stains last longer.
Colour or style change: Cosmetic updates to match renovations or curb‑appeal goals.
Surface types and appropriate finishes
Wood siding and trim: Use high‑quality acrylic latex paint for paintable surfaces; for wood decks and fences, choose semi‑transparent or solid exterior stains depending on desired look. Stain penetrates and highlights grain; paint provides more uniform, opaque protection.
Fibre cement and engineered siding: These take paint well — use 100% acrylic exterior paints designed for low‑maintenance substrates.
Brick and masonry: Breathable masonry paint or elastomeric coatings prevent moisture entrapment. Transparent sealers can protect without changing appearance.
Metal surfaces: Use rust‑inhibiting primer followed by acrylic or oil‑modified enamel for durable coverage.
PVC and vinyl: Use paints formulated for vinyl that flex
Exterior Painting and Staining
Overview Exterior painting and staining protect and enhance the look of homes and buildings while extending the life of siding, trim, decks, fences and other outdoor surfaces. Properly executed exterior finishes resist moisture, UV damage, mould and insect attack, and improve curb appeal and property value.
When to repaint or restain
Fading or chalking: Colours look dull or powdery when you run your hand over a painted surface.
Peeling or blistering: Paint has lost adhesion and is lifting from the substrate.
Water damage or rot: Staining or painting can’t fix structural rot — replace damaged wood first.
Mildew or mould growth: Dark streaks, spots or fuzzy growth indicate microbiological issues that must be cleaned prior to refinishing.
Weathering of stain: Transparent or semi-transparent stains on decking and fences often need reapplication every 1–3 years; solid stains last longer.
Colour or style change: Cosmetic updates to match renovations or curb‑appeal goals.
Surface types and appropriate finishes
Wood siding and trim: Use high‑quality acrylic latex paint for paintable surfaces; for wood decks and fences, choose semi‑transparent or solid exterior stains depending on desired look. Stain penetrates and highlights grain; paint provides more uniform, opaque protection.
Fibre cement and engineered siding: These take paint well — use 100% acrylic exterior paints designed for low‑maintenance substrates.
Brick and masonry: Breathable masonry paint or elastomeric coatings prevent moisture entrapment. Transparent sealers can protect without changing appearance.
Metal surfaces: Use rust‑inhibiting primer followed by acrylic or oil‑modified enamel for durable coverage.
PVC and vinyl: Use paints formulated for vinyl that flex with thermal movement; stains are not suitable.
Preparation steps (critical)
Inspect and repair: Replace rotten boards, secure loose trim, repair flashing and flashing tapes, and fix gaps that allow water infiltration.
Clean: Wash surfaces with mild detergent or a trisodium phosphate (TSP) alternative; use a pressure washer at a safe distance and pressure for siding and masonry. Remove mildew with a diluted bleach solution or a mildew cleaner.
Strip or sand: Remove loose paint by scraping and sanding. For lead paint (pre‑1978 homes), follow local regulations and hire certified professionals.
Caulk and seal: Recaulk joints, seams and gaps with exterior-grade caulk. Ensure window and door flashings are sound.
Prime: Apply appropriate primer to bare wood, metal and patched areas. Primer improves adhesion, blocks stains and tannin bleed, and evens surface porosity.
Product selection
Paint types: 100% acrylic latex paints offer durability, colour retention and easy cleanup. Consider low‑VOC formulas for indoor air quality and environmental concerns.
Stains: Choose oil‑ or water‑based stains. Water‑based stains dry faster, resist mildew and cleanup is easier; oil‑based penetrate deeply and may give richer tones.
Primers: Use oil‑based or bonding primers for difficult surfaces and stain‑blocking primers for tannin‑rich woods like cedar and redwood.
Clear sealers: For natural finishes or masonry where you want minimal colour change, use breathable, penetrating sealers that repel water but allow vapour transmission.
Application tips
Weather conditions: Apply paint or stain when temperatures are within manufacturer recommendations (typically 5°C–30°C) and avoid high humidity, rain or direct, hot sun which can cause blistering or lap marks.
Tools: Use brushes for cutting in and detail work, rollers for large flat areas, and airless sprayers for speed on siding — always back‑brush or back‑roll sprayed areas to ensure adhesion and even coverage.
Coats: Most exterior jobs require two coats of paint for long life. Stains may need one or more coats depending on transparency and manufacturer direction.
Drying times: Allow adequate drying between coats; colder temperatures extend cure times. Follow label instructions.
Colour selection: Darker colours absorb heat and may increase thermal movement; on certain materials this can affect durability. Test colour samples on small areas to view in different light.
Maintenance
Annual inspection: Check caulking, trim, and deck boards each year and touch up small issues promptly to prevent larger failures.
Cleaning: Soft wash painted and stained surfaces every 1–3 years to remove dirt, pollen and mildew.
Reapplication intervals: Repaint every 5–10 years depending on product, exposure and substrate. Restain decks and fences more frequently — often every 1–3 years for semi‑transparent stains and 3–7 years for solid stains.
Safety and environmental considerations
Lead paint: Homes built before 1978 may contain lead. Test suspect paint and follow Canadian federal/provinc
Marbleized Epoxy Floor Painting
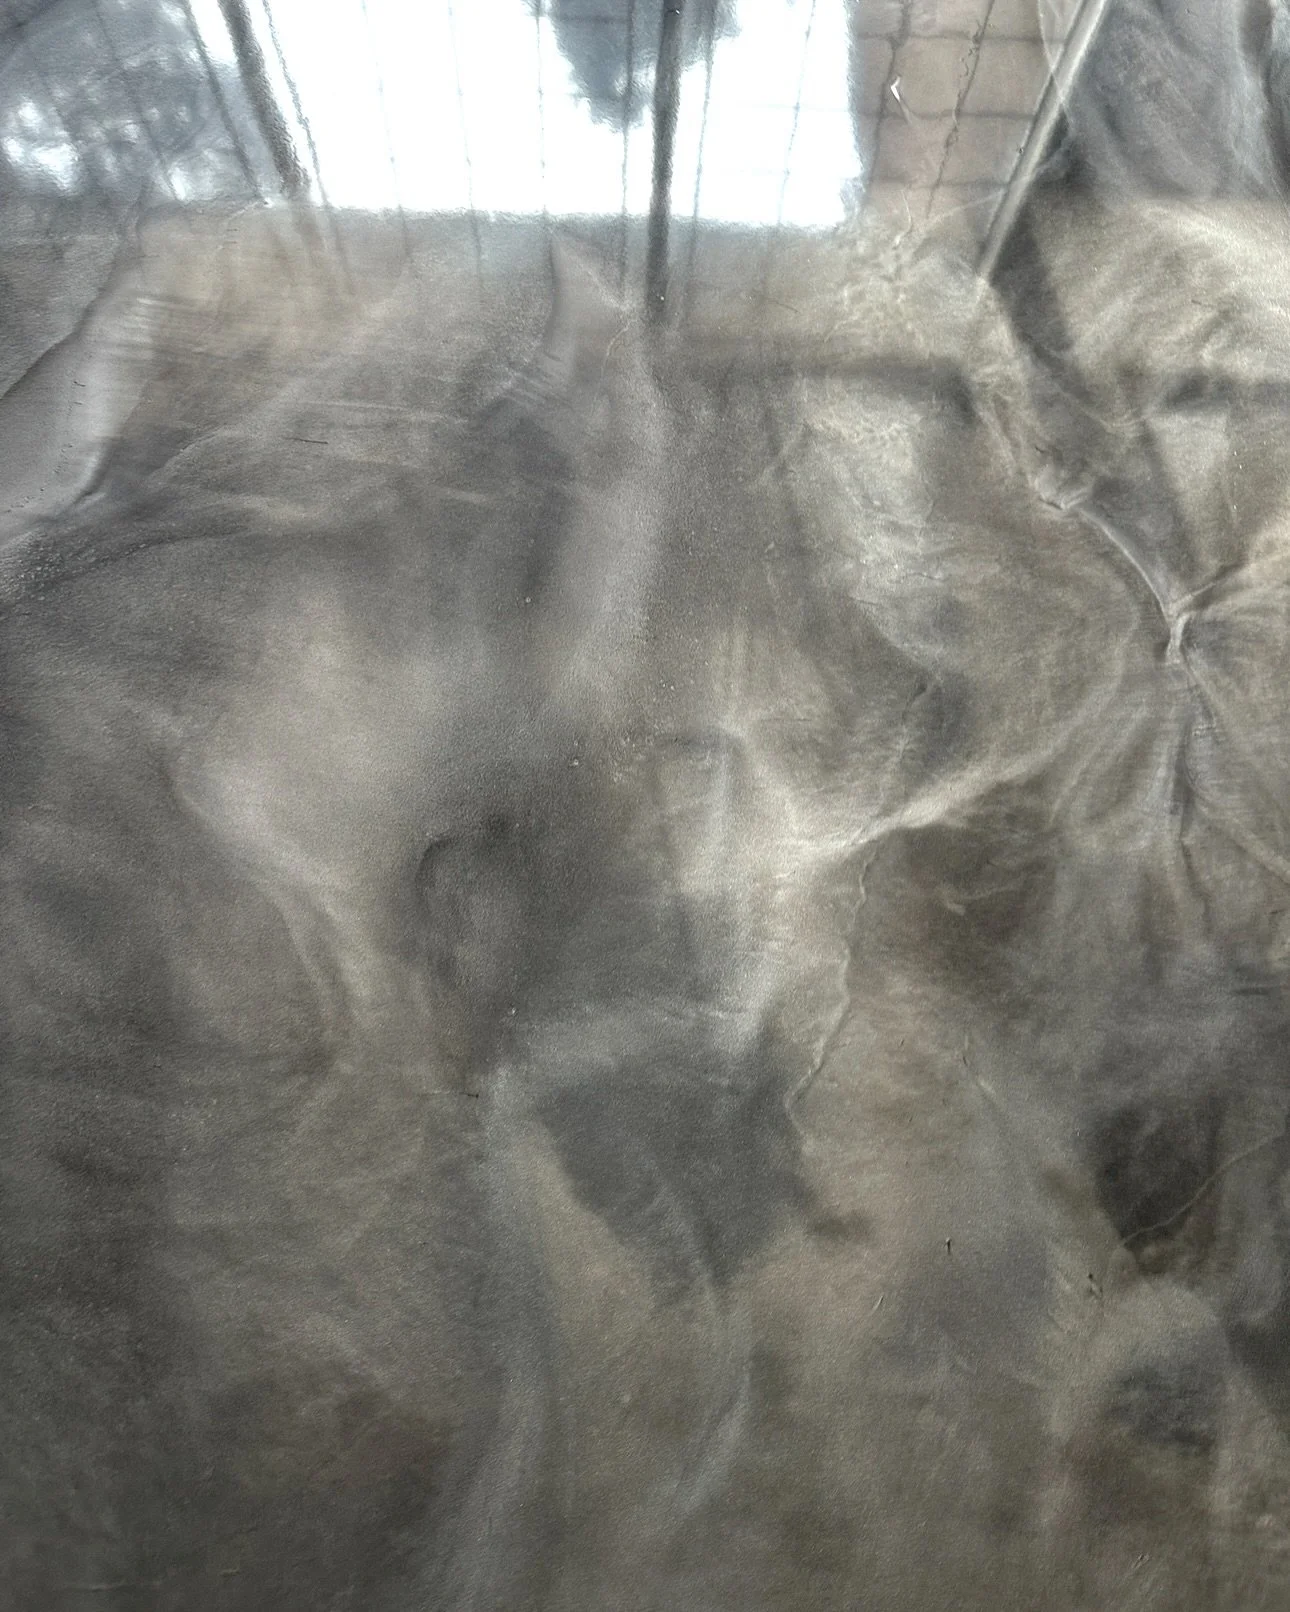
Marbleized Epoxy Floor Painting
What it is
Marbleized epoxy floor painting uses pigmented epoxy and metallic or mica additives to create a swirl, veining, or cloud-like finish that mimics natural marble. The system is applied over a prepared concrete substrate and typically includes a base epoxy, coloured or metallic additives, and a clear topcoat for durability and gloss.
Key benefits
Aesthetic: Achieves luxurious marble-like appearance with a wide range of colours and effects.
Durability: Epoxy resists abrasion, stains, chemicals and impact when properly installed.
Low maintenance: Smooth, non‑porous surface is easy to clean and disinfect.
Cost-effective: Less expensive than full marble installation and quicker to install.
Seamless: Continuous, joint-free surface reduces dirt traps and improves hygiene.
Where it’s commonly used
Residential: garages, basements, kitchens, living areas.
Commercial: showrooms, retail stores, restaurants.
Light industrial: offices, lobbies, hospitality spaces with moderate traffic.
Surface preparation
Inspect and repair: Patch cracks, spalls and deep voids with appropriate repair mortar or epoxy fillers.
Mechanical profiling: Diamond grinding or shot blasting to remove coatings, laitance and to achieve a 1–3 mil (25–75 µm) CSP (concrete surface profile) appropriate for epoxy bonding.
Clean thoroughly: Remove dust, oil, grease and contaminants with degreaser and rinse. Ensure surface is dry.
Moisture check: Test for moisture vapor emission and relative humidity within limits specified by the epoxy manufacturer. High moisture requires a vapour mitigation system before epoxy.
Priming: Apply a compatible epoxy primer to improve adhesion and reduce pinholing.
Materials and tools
Two-part epoxy base and hardener (solids content and pot life chosen for site conditions).
Metallic or mica pigments, pearl additives, UVO pigments for colour stability.
Polyurethane or polyaspartic clear topcoat for abrasion and UV resistance where needed.
Mixing containers, drill with mixing paddle.
Squeegees, notched trowels or squeegee blades for spreading base coat.
Brushes, short-nap rollers or spiked
Before / After Industrial Painting
Living Room Painting
Choosing the right paint and application technique for your living room can transform the space’s mood, perceived size, and functionality. Below is a concise guide covering colour selection, finishes, preparation, painting tips, and maintenance tailored to Canadian homes and climates.
Define your goal
Refresh: Choose a durable, mid-range paint in a neutral tone for an easy update.
Re-style: Use accent walls, two-tone treatments, or feature colours to create focal points.
Brighten or enlarge: Light, warm neutrals and cool whites reflect light and make rooms feel larger.
Cozy or intimate: Deeper, warmer colours add depth and warmth, especially in larger or well-lit living rooms.
Colour selection
Neutrals: Beiges, greys, taupes and greiges are versatile and work with many furnishings.
Warm vs cool: Warm paint (creams, warm greys, soft beiges) complements wood tones and creates a cozy feel. Cool paint (blue-greys, soft whites) feels modern and airy.
Undertones: Test samples on multiple walls; natural and evening light reveal undertones differently.
Accent walls: Use one stronger colour on a single wall behind a sofa, fireplace, or TV to create emphasis without overwhelming the room.
Consider flooring and trim: Match or contrast with baseboards, ceiling, and flooring for a cohesive look.
Paint finish selection
Matte (flat): Hides surface imperfections, offers a smooth look; less washable — good for low-traffic living rooms.
Eggshell / Low sheen: Slight sheen, more washable and easy to clean — a common choice for living rooms.
Satin: Durable and easier to clean; good for high-traffic areas or homes with children and pets.
Semi-gloss / Gloss: Best for trim, mouldings, doors, and areas needing frequent cleaning; too reflective for whole walls in most living rooms.
Preparation
Clean walls: Remove dust, fingerprints, and grease with mild detergent; rinse and let dry.
Repair: Fill holes/cracks with spackling compound; sand smooth.
Prime: Use a primer when changing from dark to light colours, painting over stains, or when walls are patched. Primer ensures even colour and better adhesion.
Protect: Tape trim, cover floors and furniture with drop cloths or plastic sheeting; remove switch plates and outlet covers.
Consider humidity and temperature: Ideal painting conditions are typically between 10–25°C and low humidity for proper drying in Canadian climates.
Painting technique
Tools: Good-quality roller and brushes reduce streaking. Use extension poles for ceilings and high areas.
Cut in first: Paint edges, corners and trim lines with a brush before rolling large wall areas.
Roll consistently: Use a “W” or “M” pattern to evenly distribute paint; maintain a wet edge to avoid lap marks.
Multiple coats: Allow recommended drying time between coats. Two coats are standard for most colours; darker or saturated colours may require more.
Trim and ceiling: Paint ceilings first (if changing), then walls, then trim for neatest results.
Accent options and treatments
Feature wall: Use wallpaper, textured paint, wood panelling, or a bolder paint colour for contrast.
Two-tone walls: Paint the lower portion in a darker shade with a chair rail or use colour blocking for modern effect.
Faux finishes: Venetian plaster or limewash offer subtle texture for an upscale look.
Colour continuity: Use consistent undertones in adjacent rooms for a smooth transition in open-plan living spaces.
Eco and health considerations
Low-VOC / zero-VOC paints: Reduce odour and indoor air pollution, important for homes with young children, pets, or sensitive occupants.
Proper ventilation: Open windows and use fans while painting and during drying to speed off-gassing.
Maintenance and care
Touch-ups: Keep leftover paint for small repairs and touch-ups.
Cleaning: Wipe walls with a soft cloth and mild detergent; avoid abrasive cleaners that strip the finish.
Repaint cycle: Living rooms typically need repainting every 7–10 years depending on wear and style changes.
Hiring a professional
When to hire: Large rooms, high ceilings, complex finishes, or when you need fast, high-quality results.
Get multiple quotes: Compare scope, paint quality, prep work, and warranties.
Ask for references and examples of previous living-room projects.
Quick checklist before you start
Measure walls to estimate paint quantity.
Select finish and colour samples; test patches on walls.
Gather supplies: primer, paint, rollers, brushes, trays, drop cloths, sandpaper, filler, painter’s tape.
Plan timing: Allow for drying between coats
The Impact of Professional Commercial Painting on Office Spaces
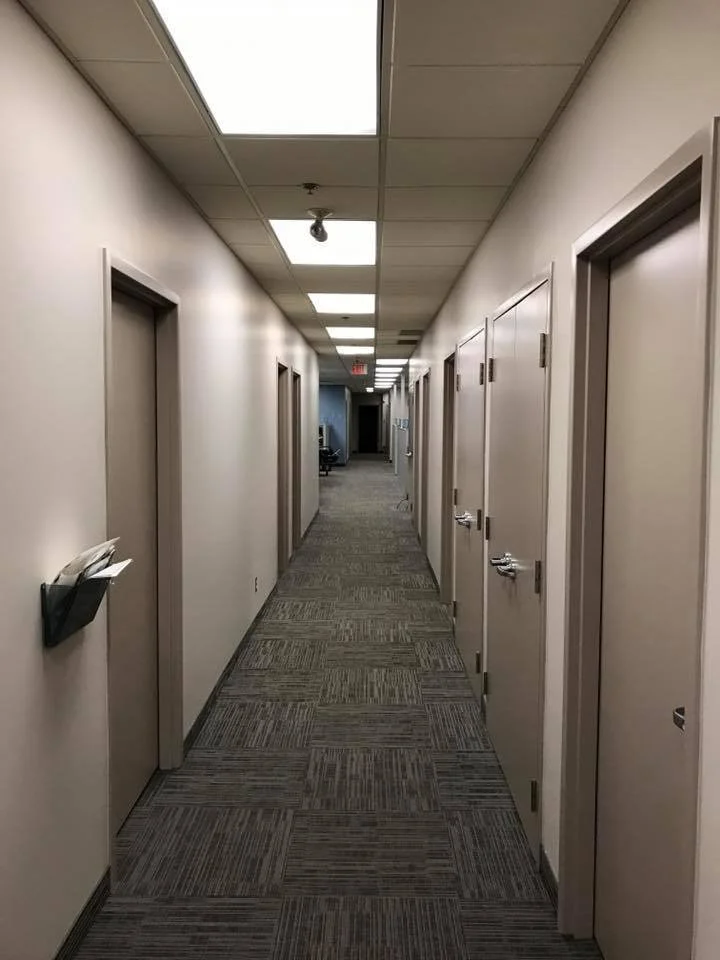
Common Areas Painting — Commercial Clients
Overview Commercial common areas are high-traffic spaces that shape clients’ and tenants’ first impressions. Thoughtful painting in lobbies, corridors, stairwells, elevators, amenity spaces and shared washrooms improves aesthetics, supports branding, increases durability and reduces long‑term maintenance costs.
Key considerations for commercial projects
Durability and finish selection: Use commercial-grade products with stain- and scuff-resistant finishes. Eggshell or satin is typical for corridors and amenity areas; semi-gloss is preferred for trim, handrails and washrooms for easier cleaning.
Surface preparation: Proper cleaning, repair, priming and moisture mitigation extend coating life. Address drywall seams, nail pops, concrete spalling and existing glossy coatings before applying finish coats.
Colour strategy and branding: Select palettes that support the building’s identity and user experience. Neutral base colours increase perceived space and light; accent walls or feature bands can highlight wayfinding, art, or brand colours.
Safety and accessibility: Choose low-VOC, low-odour products for occupied spaces. Ensure contrast levels meet accessibility guidelines for stairs, ramps and handrails. Use anti-slip coatings on floors where required.
Code and material compliance: Confirm materials meet local fire and building codes for flame spread and smoke development. In Canada, verify requirements relevant to provincial and municipal regulations and any LEED/BOMA/other sustainability targets.
Scheduling and occupant disruption: Plan phased painting to maintain access. Off-hours and weekend work reduce disruption. Coordinate with cleaning, security and building management for staging and signage.
Warranty and maintenance: Specify manufacturer warranties and provide maintenance plans that include touch-up kits, recommended cleaning procedures and projected recoat timelines.
Common space types and recommended approaches
Lobbies and reception areas: Focus on high-quality finishes and feature elements (accent walls, trims). Use durable primers and topcoats suited to high visibility and occasional impact.
Corridors and stairwells: Prioritise scuff-resistant finishes and impact protection (chair rails, vinyl corner guards). Consider two-tone schemes to hide dirt at lower wall areas.
Elevators and vestibules: Use wipeable, high-gloss or semi-gloss paints for easy cleaning. Include meticulous prep to prevent visible imperfections.
Amenity rooms and gyms: Choose mildew-resistant coatings in humid areas; harder-wearing finishes where equipment contacts walls. Colour can define activity zones.
Washrooms and locker rooms: Use moisture-tolerant primers and semi-gloss or gloss finishes; ceramic tile and waterproof substrates where required.
Parking garages and service corridors: Use concrete-appropriate coatings with chemical and abrasion resistance. Provide clear demarcation for signage, directional arrows and parking stalls.
Retail frontages within a building: Coordinate with tenant signage and storefront materials; allow for frequent touch-ups in high-contact zones.
Project workflow
Site assessment: Document existing conditions, substrate types, moisture issues and previous coatings.
Colour and finish proposal: Present palette options, mock-ups and sample panels in situ for client approval.
Surface prep plan: Detail repairs, priming strategy and equipment needs (scaffolding, lifts, containment).
Scheduling plan: Define phasing, off-hours work, access restrictions and cleaning procedures.
Execution: Carry out prep, prime, and finish coats using agreed products and quality checks.
Final inspection and touch-ups: Walk the space with client, address deficiencies and provide maintenance instructions.
Handover documentation: Supply product data sheets, warranties, maintenance schedules and touch-up materials.
Cost drivers
Surface condition and prep needs
Type and quality of coatings
Extent of access equipment (scaffolding, lifts)
After-hours or phased scheduling requirements
Special finishes, murals or branding treatments
Size and complexity of areas (ceilings, multiple levels)
Sustainability and indoor air quality
Specify low-VOC and low-odour paints to minimise occupant discomfort during and after painting.
Choose durable coatings to reduce frequency of recoat cycles.
Recycle or properly dispose of leftover materials and containers according to local regulations.
Tips for building owners and property managers
Plan painting during moderate seasonal conditions to improve drying and curing.
Combine painting with other maintenance (lighting upgrades, signage refresh, flooring repairs) to reduce repeated disruptions.
Maintain a colour log and touch-up kit to address scuffs quickly and avoid larger repaints.
Conduct annual inspections of high-traffic zones and schedule targeted maintenance before damage becomes widespread.
Conclusion Painting common areas in commercial buildings is both aesthetic and functional. With the right planning — from substrate assessment and product selection to scheduling and maintenance planning — painting improves building image, extends surface life and enhances occupant satisfaction.
Before and After Staircase Painting & Staining:
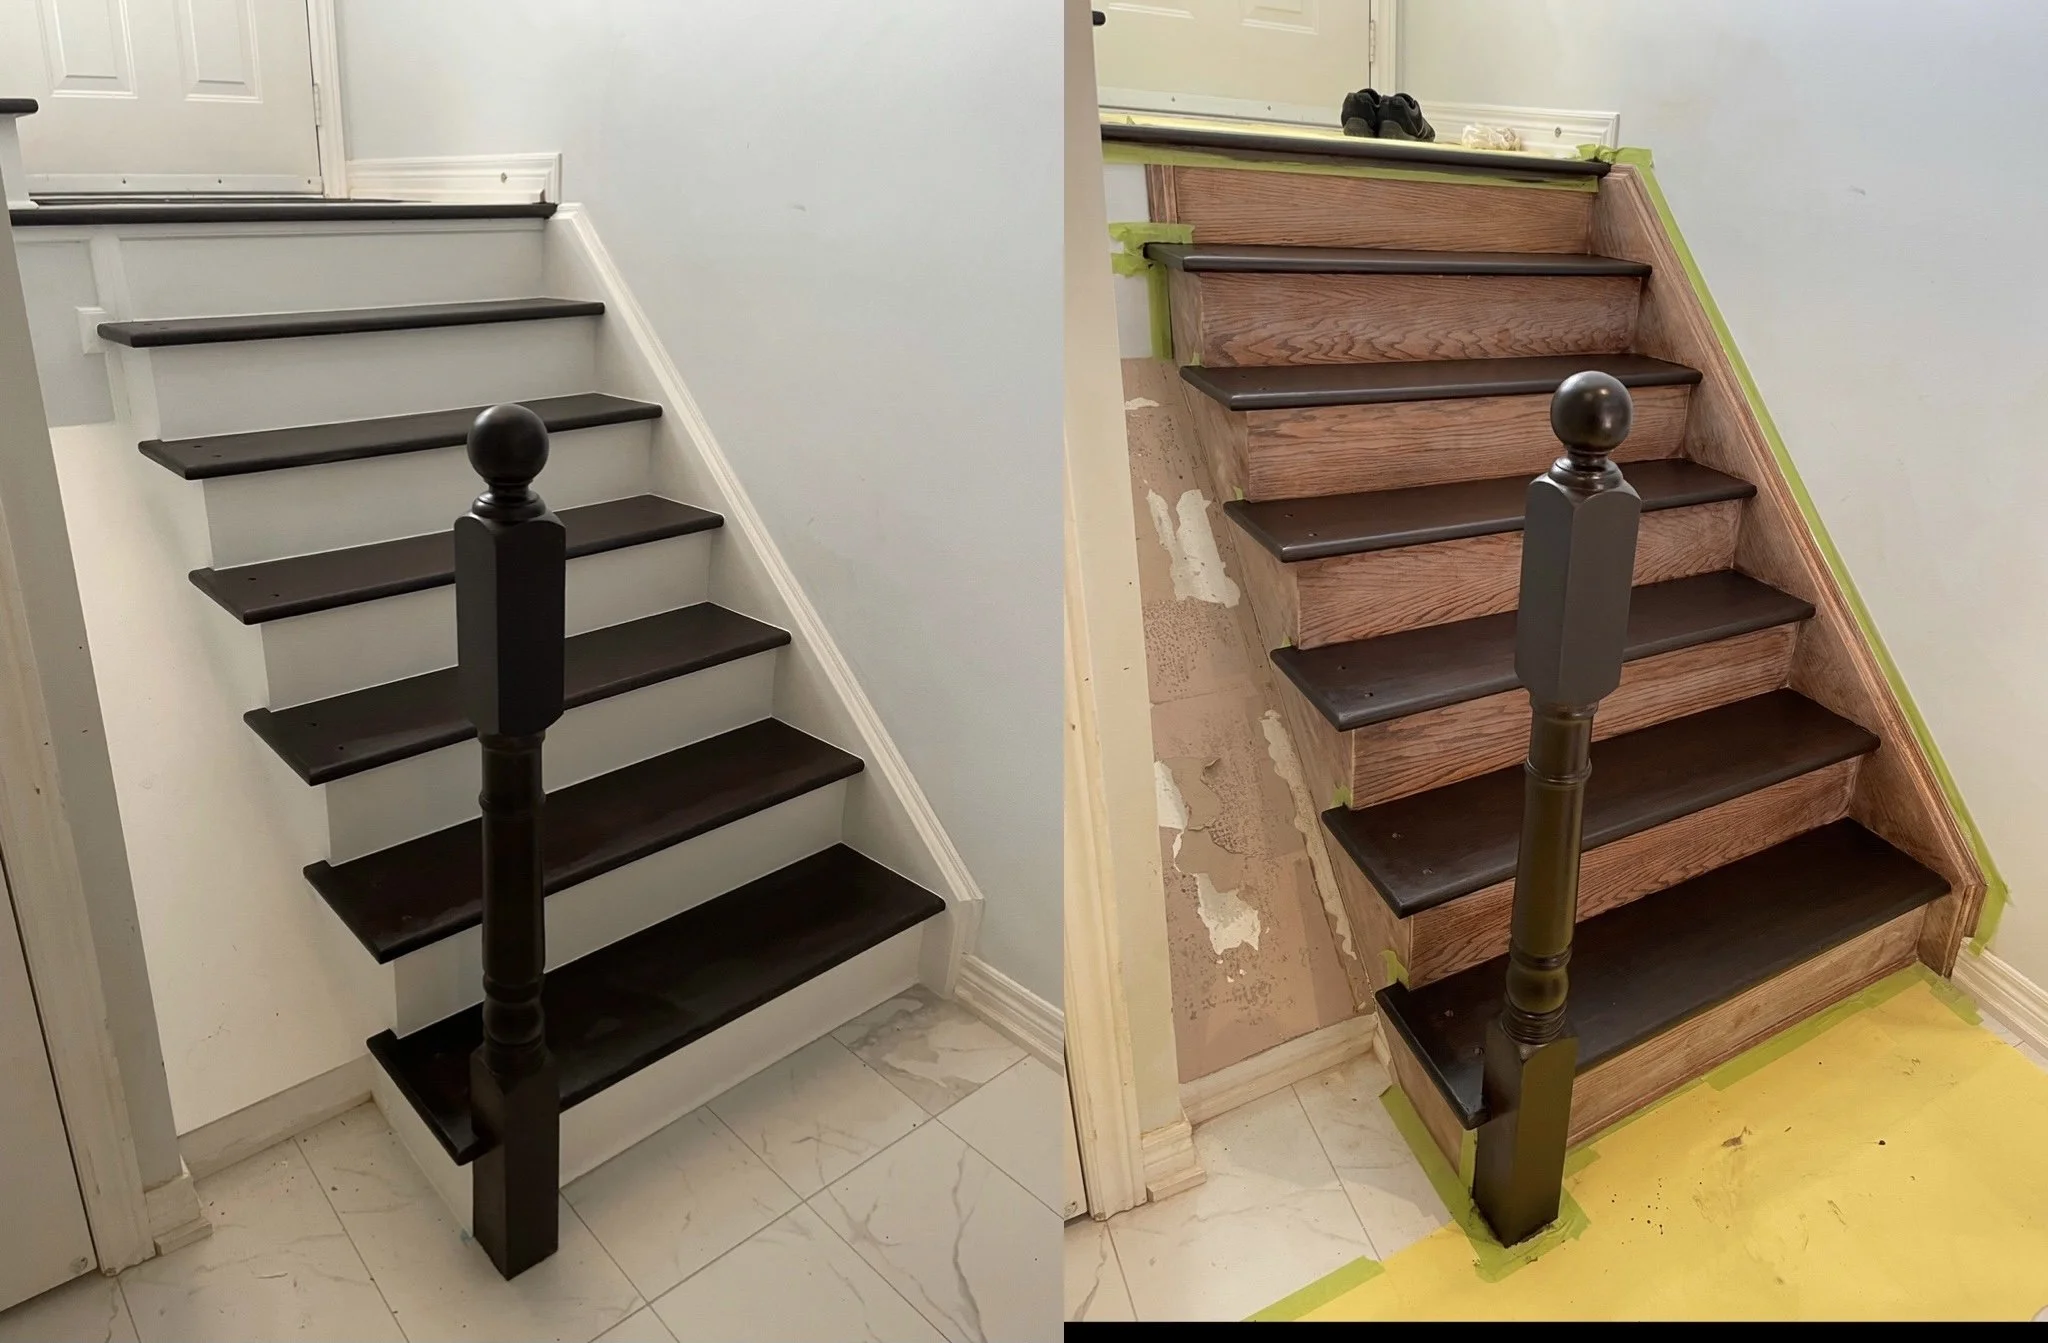
Before and After: Staining and Painting Stairs
Before
Condition assessment: Inspect treads, risers and stringers for loose boards, squeaks, rot or splits. Check for old finishes—varnish, paint or polyurethane—that will affect adhesion.
Cleaning: Remove dirt, dust and grime with a stiff brush and a household cleaner. For greasy buildup, use a degreaser. Allow surfaces to dry completely.
Repairs: Tighten loose screws or add screws into stringers and risers. Replace damaged treads or risers. Fill small holes and cracks with wood filler; let it cure and sand smooth.
Stripping (if needed): If there’s thick old paint or varnish, strip with a chemical stripper or use an orbital sander. Take proper safety precautions—ventilation, gloves and eye protection.
Sanding: Sand to remove remaining finish and to level filled areas. Start with 80–100 grit for rough removal, then progress to 120–150 grit for a smooth surface. Vacuum and tack cloth to remove dust.
Priming (for painting): Apply a high-quality stain-blocking primer to bare wood or previously painted surfaces to ensure adhesion and uniform coverage. Let primer dry according to manufacturer’s instructions.
Testing stain/paint: Test chosen stain or paint on a concealed area or scrap wood to confirm colour and sheen. Wood species will affect stain appearance.
After (Staining)
Application: Apply stain with a brush, rag or foam applicator, following the wood grain. Wipe off excess after the recommended dwell time to achieve the desired depth of colour.
Drying: Allow stain to dry fully—often 24 hours but follow product instructions and local humidity conditions.
Protective finish: Apply a clear topcoat suitable for floors and stairs, such as an oil-modified polyurethane, water-based polyurethane, or hardwax oil. Use a durable, scuff-resistant formula rated for high traffic.
Sand between coats: Lightly sand with 220–320 grit between coats to ensure adhesion and smoothness. Clean dust before the next coat.
Number of coats: Typically 2–3 coats of polyurethane for stairs, depending on manufacturer recommendations and usage expectations.
Final cure: Full cure can take several days to weeks; avoid heavy traffic until the finish has developed sufficient hardness.
After (Painting)
Application: Use a high-quality floor or trim paint formulated for durability. Apply with a brush for edges and a short-nap roller for flat areas. Work in thin, even coats to prevent drips.
Non-slip considerations: Add a non-slip additive to the topcoat or use paint with built-in grit for safety on treads.
Drying and recoating: Follow paint manufacturer’s recoat times. Two coats are common for full coverage.
Protective topcoat (optional): For extra durability, apply a clear water-based or oil-based polyurethane compatible with the paint.
Clean lines: Use painter’s tape for riser/tread transitions and remove tape while the final coat is slightly tacky to avoid peeling.
Final Inspection and Maintenance
Cure time: Respect recommended curing times before allowing regular foot traffic or moving furniture.
Hardware reinstallation: Reinstall or replace stair nosing, moulding and hardware after full cure.
Maintenance: Clean regularly with a pH-neutral cleaner and avoid abrasive tools. For painted stairs, touch up chips promptly. For stained stairs, monitor wear on high-traffic areas and refinish when finish is thin or damaged.
Safety and appearance: Ensure non-slip surfaces remain effective; replace or refresh grit additives as needed. Reassess lighting and handrails for safety and visual impact.
Visual transformation summary
Before: Worn, dull or mismatched surfaces; visible damage; uneven colour; unsafe or tired appearance.
After (stained): Richer wood tone, enhanced grain, durable clear finish, natural look preserved.
After (painted): Clean, uniform colour, modern or classic style options, potentially higher contrast and renewed brightness.
Estimated timeline (typical)
Prep and repairs: 1–2 days (depends on extent of repairs and drying times)
Staining route: Stain day, then 2–3 days for clear coats and light sanding between coats → 3–7 days total.
Painting route: Primer + 1–2 paint coats + optional topcoat, with drying between coats → 2–5 days total.
Materials checklist
Safety gear: dust mask/respirator, gloves, eye protection
Cleaning supplies: degreaser, rags, brushes
Tools: sander, sanding discs, vacuum, tape measure, drill/screwdriver
Finishing supplies: primer (if painting), stain, paint, polyurethane/topcoat, brushes, rollers, tack cloth
Exterior Painting & Wood Stain
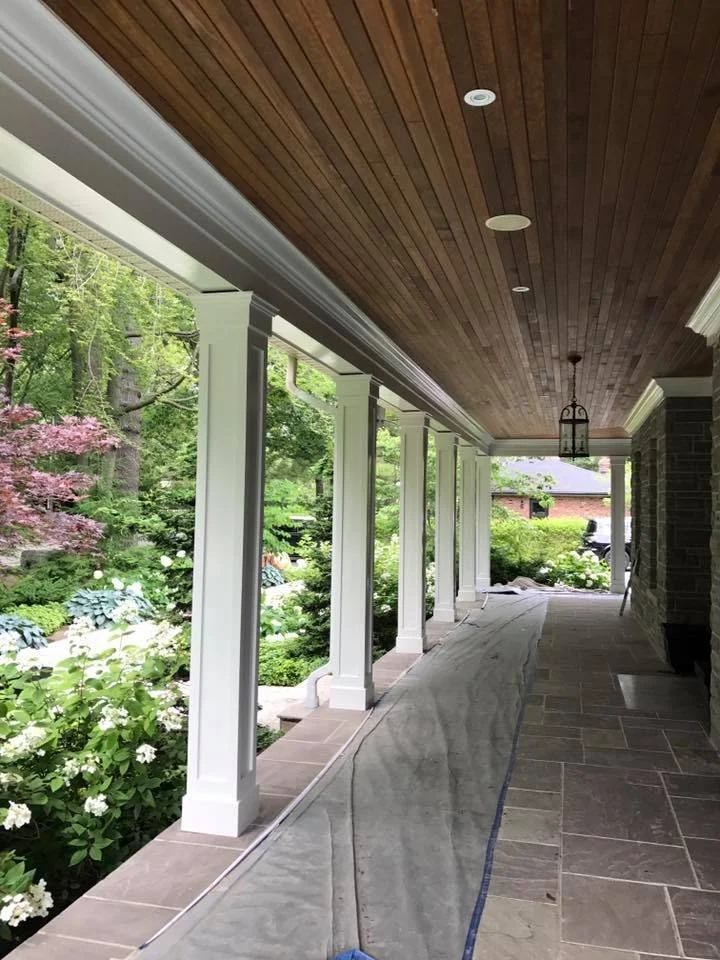
Exterior Painting and Staining
Selecting the right approach for exterior painting and staining protects your home, enhances curb appeal, and extends the life of siding, trim and decks. Whether you’re refreshing faded paint, renewing weathered stain, or preparing surfaces for a full colour change, the following guidance covers materials, surface preparation, application techniques and maintenance best practices for Canadian climates.
Materials and finishes
Paint types:
100% acrylic latex: Best general choice for siding, trim and soffits — flexible, durable, resists chalking and holds colour well in sun and cold.
Alkyd (oil-modified) enamels: Useful for metal or high-traffic trim; older houses often have oil-based finishes underneath, which can affect adhesion.
Primer: Use a stain-blocking primer for tannin-rich woods (cedar), knots, or surfaces with previous staining or water damage.
Stain types:
Transparent and semi-transparent stains: Preserve wood grain; best for decks, fences and cedar siding. Reapplication every 1–3 years may be required depending on exposure.
Semi-solid and solid stains: Provide more pigment and protection while still showing some texture; extend maintenance intervals to 3–5 years.
Deck-specific formulations: Include slip resistance and UV inhibitors.
Sheen recommendations:
Flat to low-sheen paints for broad siding to mask imperfections.
Satin or eggshell for ease of cleaning on trim and doors.
Semi-gloss or gloss for window frames, fascia and other trim requiring frequent washing.
Surface preparation
Inspection:
Check for rot, insect damage, and loose boards. Replace or repair compromised wood before finishing.
Test adhesion on existing surfaces if unsure of previous coatings.
Cleaning:
Remove dirt, mildew and flaking coatings using pressure washing (use moderate pressure for wood to avoid damage) or scrubbing with a house-cleaning solution.
Allow adequate drying time — often several days in cool or humid conditions.
Removing loose paint and sanding:
Scrape and sand back to a feathered edge to ensure new paint bonds well. On older homes, test for lead-based paint and follow appropriate removal/disposal regulations if present.
For large areas, power sanding should be used cautiously to avoid gouging.
Repair and priming:
Fill cracks and nail holes with suitable exterior-grade filler.
Prime bare wood, repaired areas and metal with an appropriate primer. For cedar and other high-tannin woods, use a stain-blocking primer.
For surfaces with mildew, treat with a bleach solution or mildew remover before priming.
Application techniques
Conditions:
Ideal temperature range for most exterior paints and stains: 10°C to 25°C. Avoid application when freezing temperatures are expected within 24 hours or in direct, hot sun that can cause flash drying.
Avoid painting in high humidity or rain.
Tools:
Brushes: Synthetic bristles for latex; natural bristles for oil-based products.
Rollers: Use appropriate nap length based on siding texture.
Sprayers: Airless sprayers speed application on large areas and textured surfaces; always back-roll or brush after spraying for uniform coverage and adhesion.
Coats:
Two coats of finish paint over a properly primed surface are standard for durability and colour uniformity.
For stains, follow manufacturer directions; some solid stains act like paint and usually require two coats, while transparent stains may need only one.
Trim and detail work:
Paint trim after siding to avoid drips; caulk joints between trim and siding with a paintable exterior caulk.
Use painter’s tape where necessary for sharp lines, removing tape before the final coat fully cures.
Special considerations for Canadian climates
Freeze–thaw cycles: Use flexible, acrylic formulations that tolerate expansion and contraction. Ensure proper sealing and flashing around windows and doors to prevent water ingress that accelerates finish failure.
UV exposure: Southern and western exposures receive higher UV stress; select products with strong UV resistance and consider more frequent maintenance on decks and exposed trim.
Moisture and mould: In coastal or humid areas, choose products with mildewcide additives and ensure good ventilation in eaves and soffits to reduce trapped moisture.
Decks, fences and pergolas
Wood selection and preparation:
Use pressure-treated lumber for structural parts and rot-resistant species (cedar, redwood) for visible
Commercial Stairway Painting
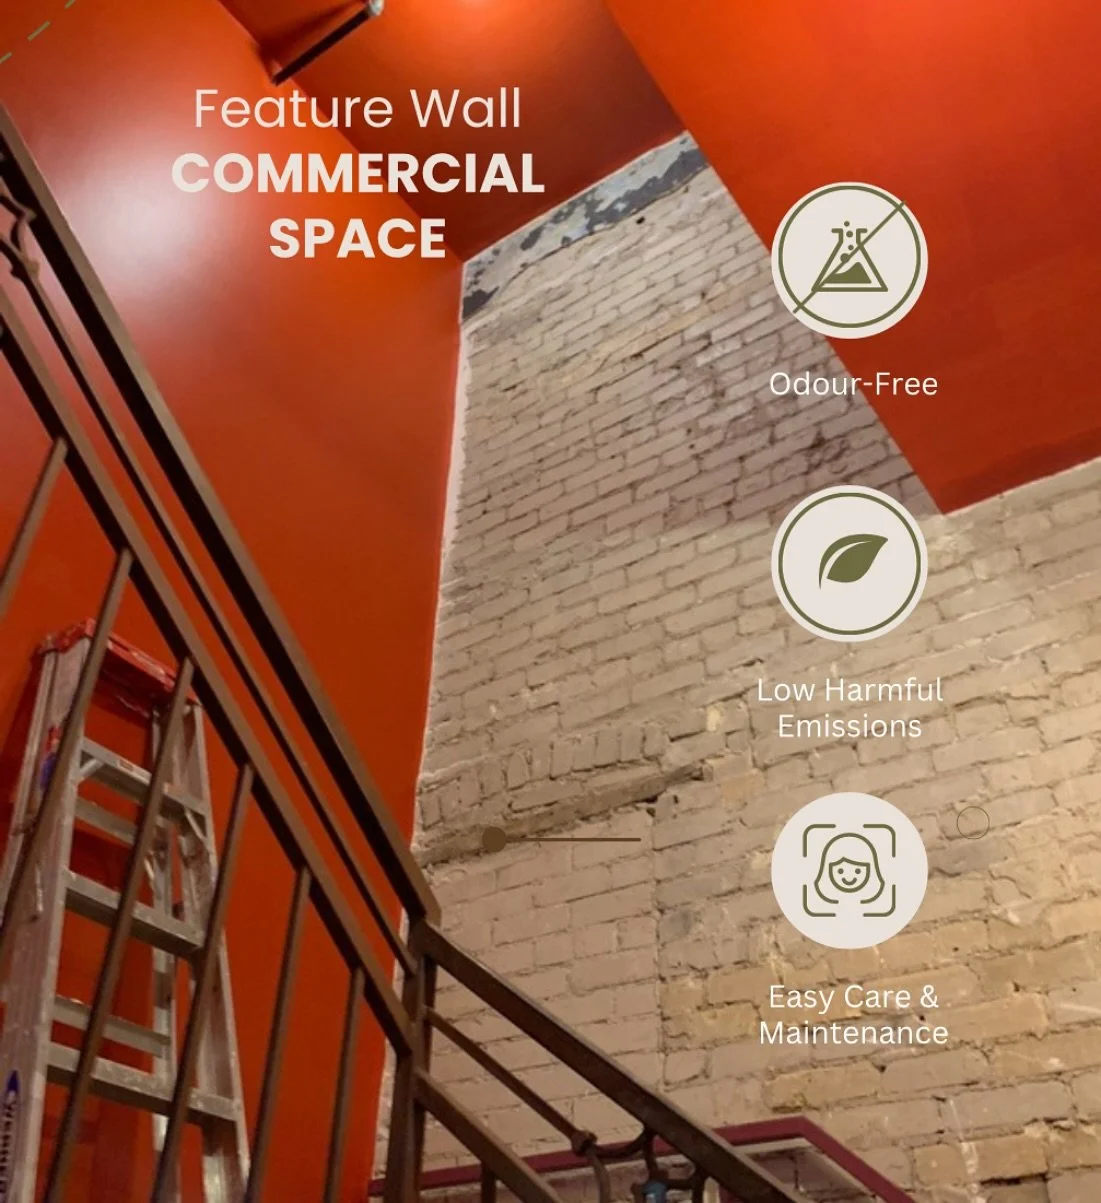
Commercial Feature Wall Painting
A commercial feature wall is a powerful design element that can transform an ordinary workspace into a distinctive, on-brand environment. Whether you’re refreshing an office lobby, retail storefront, hotel reception or restaurant interior, a professionally painted feature wall creates focal interest, reinforces brand identity and improves customer and employee experience.
Why choose a painted feature wall?
Cost-effective impact: Painting a single wall is far less expensive than full-room renovations but delivers immediate visual change.
Brand reinforcement: Use colours, logos, or slogans that align with your brand palette to strengthen recognition.
Versatility: From subtle textures and muted tones to bold murals and geometric patterns, paint techniques suit any aesthetic.
Quick turnaround: Professional painters can complete most feature-wall projects in a day or two, minimising business disruption.
Durable and maintainable: Commercial-grade paints and finishes stand up to wear, are easy to clean and can be retouched as needed.
Popular feature wall styles for commercial spaces
Accent colour wall: A single bold or contrasting colour to draw attention or define a space.
Textured finishes: Venetian plaster, suede effects, or faux concrete for a tactile, upscale appearance.
Geometric patterns: Sharp lines, colour blocking or repeating motifs that lend a modern, custom look.
Mural and illustrative art: Hand-painted or stencilled imagery that tells a brand story or creates a memorable environment.
Brand graphics and logos: High-quality painted logos or slogan walls that communicate identity clearly.
Ombre and gradient walls: Smooth colour transitions that create depth and a sophisticated atmosphere.
Chalkboard or writable walls: Functional surfaces for menus, announcements or interactive customer engagement.
The process — what to expect
Consultation and design
Discuss goals, brand guidelines, and functional needs.
Site visit and measurements to assess surface condition, lighting and access.
Design options: colour choices, pattern mockups and finish recommendations.
Preparation
Protect floors, furnishings and fixtures with drop cloths and masking.
Repair and prime surfaces: filling holes, sanding and applying appropriate primers for adhesion and longevity.
Painting and detailing
Apply base coats with consistent coverage.
Execute feature techniques—stencilling, masking for geometric lines, or hand-painted mural work—using skilled applicators.
Finish with protective topcoats where required (washable, scuff-resistant or anti-graffiti coatings).
Clean-up and handover
Remove all masking, clean the site and perform a final inspection with the client.
Provide care instructions and touch-up recommendations.
Material and finish selection
Paint type: Use commercial-grade acrylic or alkyd paints depending on the surface and durability needs.
Finish level: Matte and eggshell hide imperfections; satin and semi-gloss are easier to clean and more durable for high-traffic areas.
Environmental considerations: Low-VOC and zero-VOC options improve indoor air quality and support sustainability goals.
Budget considerations
Costs vary based on wall size, complexity of design, surface preparation, and finish products. Simple accent walls are typically the most affordable; custom murals and intricate stencilling increase labour and design time. Request a detailed written estimate with scope, timelines and warranty information.
Maintenance and longevity
Use washable finishes in high-traffic zones and follow manufacturer cleaning instructions.
Schedule periodic inspections for scuffs or chips; small areas can be retouched to extend the life of the wall.
For writable or chalkboard walls, follow reconditioning steps recommended by the painter.
Choosing a professional painter
Look for commercial experience, relevant certifications and a portfolio of feature-wall projects.
Ask for references, proof of insurance and a clear contract outlining project milestones.
Ensure the painter works with your maintenance team to plan minimal operational disruption.
A well-executed feature wall is a cost-efficient, high-impact way to strengthen brand presence and improve the look and feel of commercial spaces. With the right design and professional execution, a painted feature wall becomes a long-lasting asset that supports both aesthetics and function.