
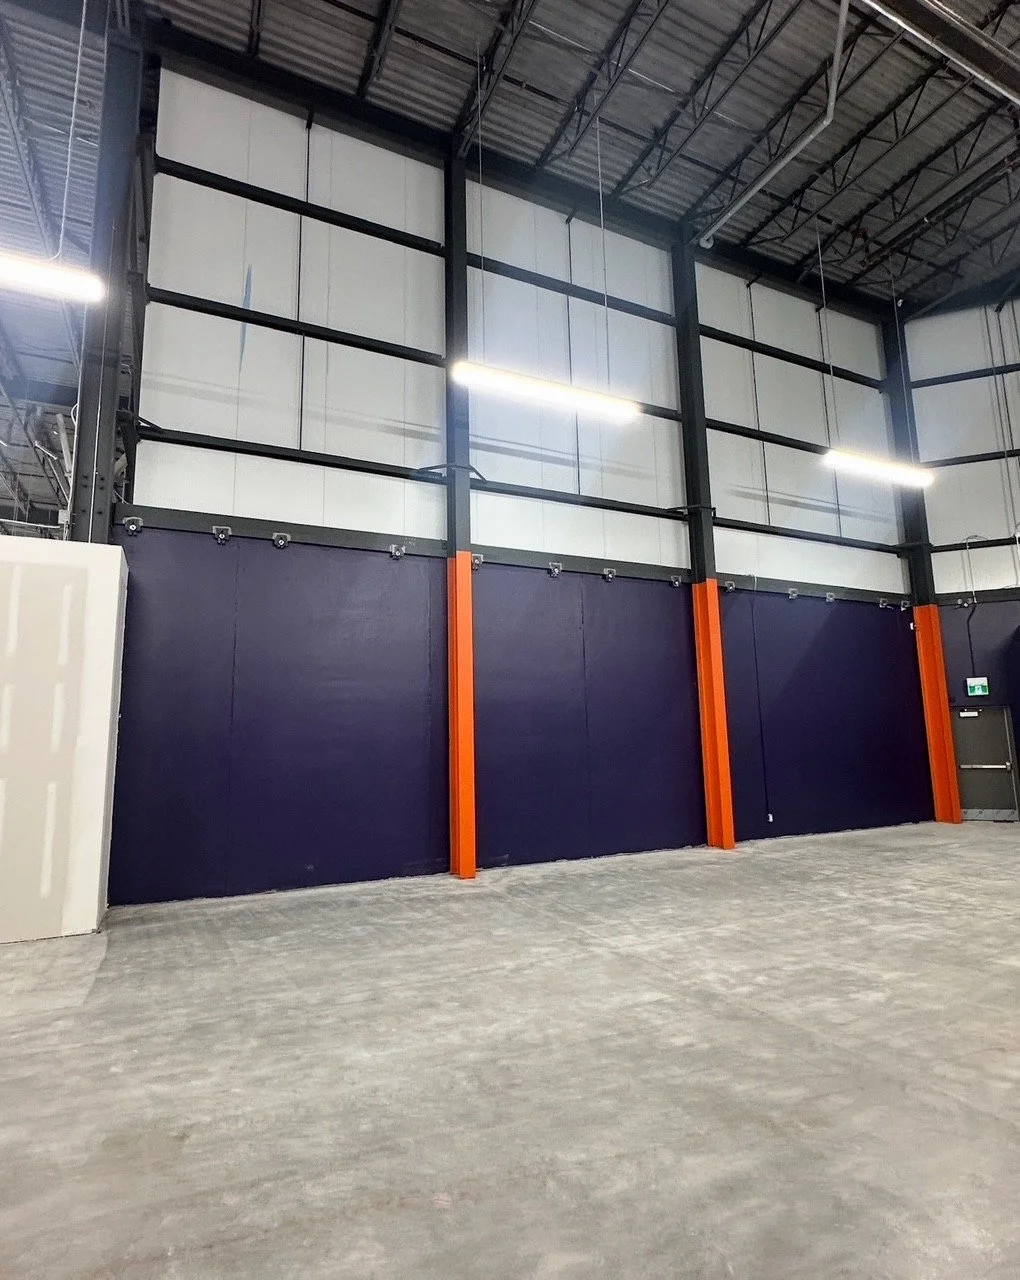
Interior Industrial Painting
Commercial Sports Complex Interior Painting
Overview A professional interior paint project for a commercial sports complex enhances aesthetics, improves durability, and supports safety and wayfinding. Proper planning and execution are essential to minimise downtime, protect specialized surfaces, and deliver a long-lasting finish suited to high-traffic athletic environments.
Key considerations
Surface types: Gym floors (wood or synthetic), concrete block or poured concrete walls, metal railings and bleachers, acoustic panels, locker rooms, restrooms, offices, corridors, concessions and walkways. Each requires specific preparation and coatings.
Traffic and impact: Athletic spaces face frequent abrasion, scuffs, ball strikes and equipment contact. Use abrasion-resistant coatings and high-impact finishes where needed.
Moisture and humidity: Pool areas, steam rooms, locker rooms and some indoor courts require moisture-tolerant primers and mould- and mildew-resistant paints.
Safety and code: Select low-VOC paints for indoor air quality. Ensure finishes meet local fire, slip-resistance and accessibility regulations (e.g., contrast colours for visual cues, non-reflective finishes in spectator areas).
Downtime and scheduling: Coordinate painting during off-hours, seasonal closures, or phased sections to keep facilities operational. Plan for curing times and ventilation.
Colour and branding: Use team colours and brand identity consistently; apply durable graphics, stripes and court lines using specialised coatings for crisp edges and long wear.
Acoustics and lighting: Matte or low-sheen coatings reduce glare; acoustic panel-compatible coatings preserve sound control properties.
Recommended coatings and approaches
Gym and court surfaces:
Wood: Sport-grade acrylic finishes designed for hardwood courts. Use oil-modified or water-based urethane floor finish per manufacturer recommendations. Ensure proper sanding, fill and sealer steps; apply multiple topcoats for abrasion resistance and consistent sheen.
Synthetic (vinyl, polyurethane surfacing): Use coatings compatible with the manufacturer’s surface — typically water-based elastomeric or acrylic topcoats formulated for sports surfaces.
Line marking: Use durable, quick-dry line paints formulated for sports courts; consider using stencils and tape designed for sport lines.
Concrete floors and ramps:
Use epoxy or polyaspartic floor coatings for high-wear zones, entrances and multipurpose areas. Polyaspartic cures fast and allows quick return to service.
Walls and block:
Seal and prime concrete block with masonry primer. Use high-hide, washable acrylic latex paints for easy cleaning and touchups. In high-contact areas, consider epoxy-modified wall coatings.
Metal surfaces:
Remove rust, prime with corrosion-inhibiting primer, then finish with enamel or polyurethane topcoat suited to metal.
Restrooms, locker rooms and pool-adjacent areas:
Use mildew-resistant, washable epoxy or acrylic coatings designed for high-moisture environments.
Acoustic panels and ceilings:
Use breathable, low-VOC pigment coatings specifically rated for acoustic substrates to avoid reducing sound absorption.
Bleachers and spectator seating:
Use abrasion- and UV-resistant coatings for trotted metal or plastic seating and risers.
Preparation and execution
Inspection and testing: Assess substrates for moisture content, existing coatings, contaminants, and structural issues. Conduct adhesion and moisture tests where necessary.
Surface preparation: Pressure wash concrete (where appropriate), sand or abrade floors and metals, repair cracks and holes, apply fillers and sealants. Remove mould and mildew using appropriate cleaners and allow surfaces to dry.
Priming: Use primers matched to substrate and topcoat chemistry — e.g., epoxy primers for concrete or floors, zinc-rich or anti-corrosive primers for metal, stain-blocking primers for nicotine or graffiti-affected areas.
Application methods: Use rollers and brushes for walls and ceilings; use floor finish machines and squeegees for large floor areas; spray application for speed on walls and metal when ventilation and masking permit. Mask and protect fixtures, glass, vents and flooring not being coated.
Quality control: Monitor film thickness, adhesion, and uniformity. Perform test sections for colour and sheen approval. Maintain environmental controls (temperature, humidity) during application and cure.
Safety and ventilation: Implement dust and fume control, respiratory protection, and confined-space procedures where needed. Post signage and restrict access until coatings have cured.
Maintenance and warranties
Provide a maintenance schedule: recommended cleaning procedures, approved cleaning agents, spot-repair methods and recoat intervals for high-wear zones.
Warranty and documentation: Offer written warranty terms for materials and labour. Provide product data sheets, safety data sheets and maintenance instructions to facility managers.
Estimated timeline (example for medium-sized facility)
Inspection and planning: 1–3 days
Surface prep and repairs: 3–7 days
Priming and painting (phased): 3–
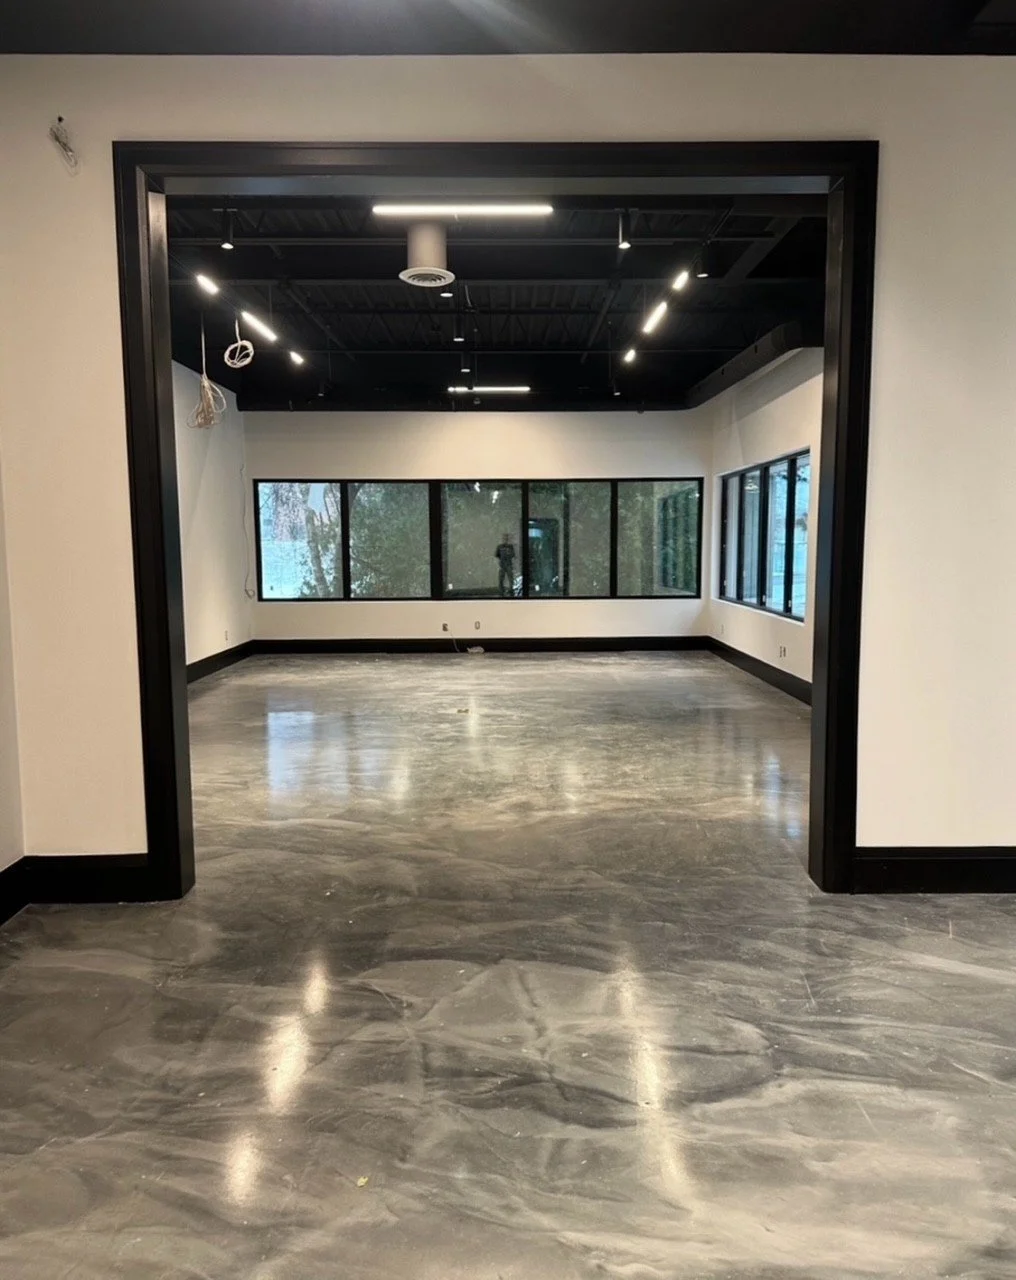
Polished Concrete Epoxy Floor
Marbleized Silver Epoxy Floor Painting
Overview
A marbleized silver epoxy floor combines durability with a high-end, reflective appearance that mimics natural marble. This finish uses metallic pigments suspended in epoxy to create flowing, three-dimensional patterns with silver, grey and pearlescent highlights. It’s suitable for residential garages, basements, showrooms and commercial spaces where both aesthetics and resilience are important.
Benefits
Appearance: Produces a luxurious, polished look with depth and metallic shimmer that changes with light and viewing angle.
Durability: Epoxy provides a hard, impact- and abrasion-resistant surface that stands up to foot traffic, light vehicle traffic and cleaning.
Chemical resistance: Properly formulated and cured epoxy resists many household chemicals, oils and detergents.
Seamless surface: Easy to clean and sanitary because there are no grout lines or joints.
Customizable: Colour intensity, veining patterns and topcoat sheen can be adjusted to match design goals.
Where to use
Residential: Garage floors, basements, entryways, feature rooms.
Commercial: Retail showrooms, boutique stores, offices, hospitality areas.
Light-industrial: Areas with moderate traffic where an attractive, protective floor is desired.
Materials and tools
Two-part epoxy resin and hardener formulated for floor coating.
Metallic epoxy pigments (silver, pearl, pewter) and tinting colours (greys, charcoals).
Primer concrete sealer (if needed) compatible with epoxy.
Polyurethane or polyaspartic clear topcoat (optional for UV resistance and extra abrasion protection).
Concrete patch/filler for repairs.
Diamond grinder or shot blaster for surface preparation.
Acid etch kit (alternative for light prep) or neutralizing solution.
Mixing pails, drill with mixing paddle, disposable stirring sticks.
Notched squeegee, trowel, metal roller, spiked shoes.
Solvent-resistant gloves, goggles, respirator appropriate for VOCs.
Painter’s tape and plastic sheeting for masking.
Preparation
Assess substrate: Ensure concrete is structurally sound, dry and within acceptable moisture limits. Test for moisture vapour transmission (MVT) or perform a calcium chloride test as required.
Repair: Fill cracks and spalls with appropriate concrete filler or epoxy patch. Allow full cure.
Surface profile: Mechanically prepare the surface using a diamond grinder or shot blaster to achieve ICRI CSP 2–3 (light to medium profile). This ensures good epoxy adhesion. Acid etching is a lower-quality alternative but less reliable.
Clean: Remove all dust, oil, grease and contaminants. Use a vacuum and tack cloth; allow surface to dry.
Prime: Apply epoxy primer per manufacturer instructions to improve adhesion and reduce pinholing. Allow to cure to tack-free stage specified by product.
Application process
Mix epoxy base and hardener according to manufacturer’s ratios. Mix thoroughly, scraping sides and bottom, and avoid whipping excess air into the mix.
Apply base coat: Use a notched squeegee or roller to apply a thin, even base layer (often a light grey or neutral tone). Work in manageable sections to maintain a wet edge. Back-roll with a roller to remove lines.
Create marble effect: While the base coat is still wet (work within pot life and tack window), broadcast or drop metallic pigments and colours. Techniques include:
Pouring circular pools of metallic pigment and using a brush, trowel or roller to swirl and feather into marbling patterns.
Spraying or flicking pigment with a chip brush for veining.
Back-brushing and dragging a notched trowel lightly to form soft, layered veins.
Using a heat gun or propane torch at a distance to level and help pigments flow—use caution to avoid overheating.
Blend and refine: Step back frequently to evaluate pattern and consistency. Add more pigment for depth or soften areas with a clean roller. Avoid overworking, which can muddy colours.
Allow to flash off: Let the decorative layer partially cure per product specifications until sufficiently tack-free to accept a clear topcoat (timing varies by product and temperature).
Clear topcoat: Apply one or two coats of a clear polyurethane, polyaspartic or epoxy topcoat for chemical resistance, UV stability and desired sheen. Use a roller for even coverage and back-roll to remove bubbles. Maintain recommended recoat windows to ensure proper intercoat adhesion.
Finishing options and sheen
High gloss: Maximizes metallic shimmer and depth—common choice for marbleized finishes.
Satin: Slightly less reflective
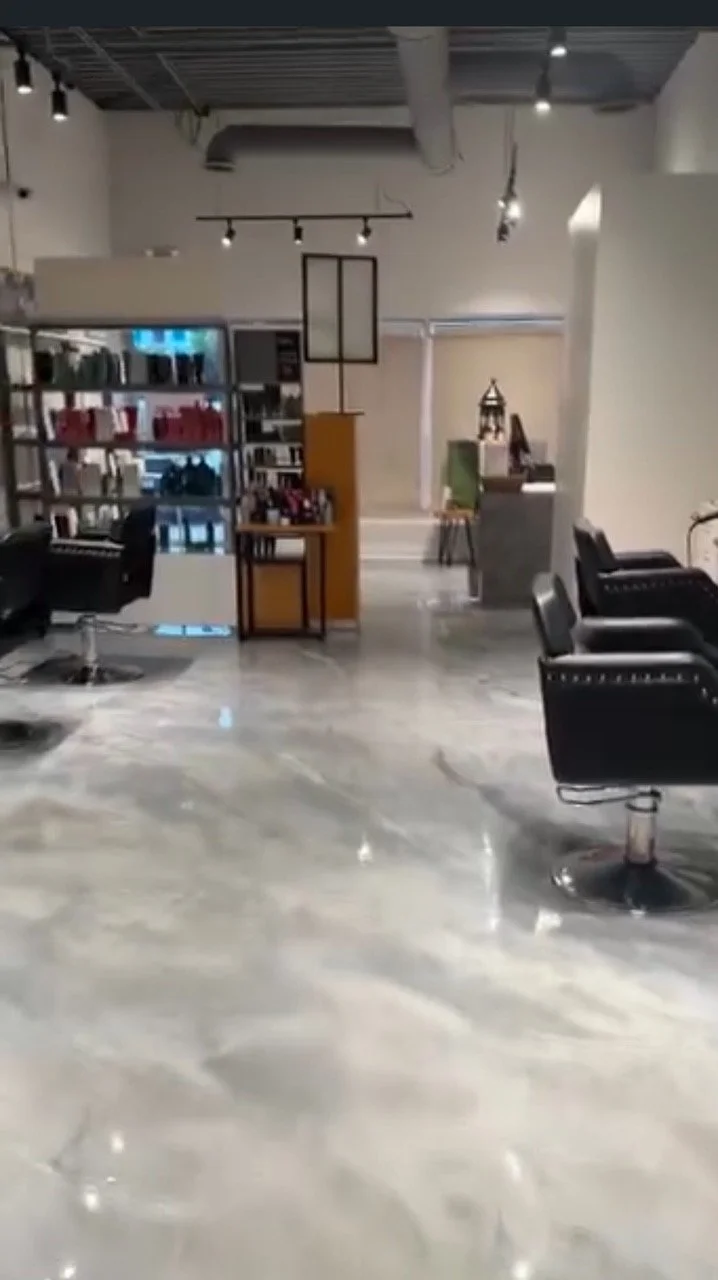
Epoxy Marble Silver
Epoxy Marble Silver Salon Flooring
Overview Epoxy marble silver flooring combines the high-gloss, seamless finish of epoxy resin with a silver-grey marble effect. It is well suited to salons that want a modern, polished look that is durable, easy to maintain and visually striking. The finish creates depth and subtle veining, reflecting light to make spaces feel brighter and more spacious.
Key characteristics
Appearance: Metallic silver base with marble-like swirls and veins; high gloss or satin topcoat options. Finish ranges from subtle shimmer to dramatic, reflective surfaces depending on pigment and metallic flakes used.
Durability: Excellent resistance to foot traffic, salon chairs, rolling trolleys and most chemical spills (hair products, shampoos, disinfectants) when properly installed and sealed.
Seamless surface: No grout lines or seams, reducing places for dirt and bacteria to collect — important for hygiene in a salon environment.
Easy maintenance: Smooth, non-porous surface that wipes clean with mild detergent and water. Periodic recoat can restore shine and repair light surface wear.
Customisability: Pigment concentration, metallic flake sizes, veining techniques and topcoat sheen can be tailored to match brand colours and interior design.
Lifespan: Properly installed and maintained epoxy marble floors typically last 7–15 years before major refurbishment is required; lifetime varies with usage and maintenance.
Benefits for salons
Professional aesthetic: Creates a contemporary, upscale atmosphere that complements modern styling stations and lighting.
Light reflection: Silver tones and metallic pigments enhance ambient and task lighting, improving visibility for colour and precision work.
Slip resistance: Additives and textured topcoats can be included to reduce slip risk in wet zones like near wash stations.
Quick repairs: Small chips or surface damage can often be repaired locally without replacing the whole floor.
Cost-effective: Lower long-term maintenance and good longevity make epoxy marble an economical choice compared with natural stone or tile, while achieving a similar premium look.
Installation process (summary)
Subfloor assessment: Inspect and prepare concrete or substrate; repair cracks, level and ensure proper moisture levels.
Moisture mitigation: Apply vapour barrier or moisture control systems if substrate moisture exceeds recommended levels.
Primer: Apply an epoxy primer to promote adhesion and seal the substrate.
Base coat and metallic effect: Pour and spread the base epoxy; while wet, apply metallic pigments and manipulate to create marble-style patterns and veining.
Curing: Allow adequate curing time between coats and before foot traffic—typically 24–72 hours depending on product and conditions.
Decorative additives: Optional flakes or metallic powders can be broadcast for additional texture and depth.
Topcoat: Apply a durable polyurethane or polyaspartic topcoat for UV stability, chemical resistance and desired sheen.
Final cure and inspection: Ensure full cure before reopening; verify slip resistance and finish uniformity.
Considerations before choosing
Substrate condition and moisture: Concrete with high moisture may need remediation; poor substrate can lead to delamination.
UV exposure: Some epoxy systems yellow or change colour with prolonged UV exposure; choose UV-stable topcoats if the salon has extensive sunlight.
Downtime: Installation requires phased work and curing time—plan around salon operations to minimise disruption.
Budget vs performance: Polyaspartic topcoats cost more but cure faster and resist yellowing better than standard epoxy topcoats.
Maintenance schedule: Establish cleaning protocols and periodic inspection/recoat intervals to preserve appearance and function.
Maintenance tips
Daily cleaning: Sweep or dust-mop to remove grit; damp-mop with pH-neutral cleaner.
Spill management: Wipe spills promptly to avoid staining and chemical exposure.
Protective pads: Use felt pads under salon chairs, furniture and rolling equipment to reduce scratching.
Avoid harsh chemicals: Do not use abrasive cleaners, bleach or solvents that could damage the topcoat.
Recoating: Schedule inspection every 2–5 years; light sanding and a fresh topcoat can restore gloss and protection.
Design ideas
Minimalist modern: Smooth silver base with subtle white veining and satin finish for an elegant, understated look.
High-gloss glamour: Intense metallic pigments with larger flakes and a mirror-like gloss topcoat for a luxe salon experience.
Two-tone zones: Use silver marble flooring in styling areas and a contrasting neutral epoxy in waiting or retail zones to define spaces.
Embedded accents: Incorporate logo inlay, glitter accents or colour chips near reception to create focal points.
Conclusion Epoxy marble silver flooring offers salons a durable, hygienic and visually appealing surface that enhances lighting and supports high-traffic use. Selecting a quality installer and appropriate system for the salon’s substrate and sunlight exposure will ensure long-lasting performance and a premium finish.
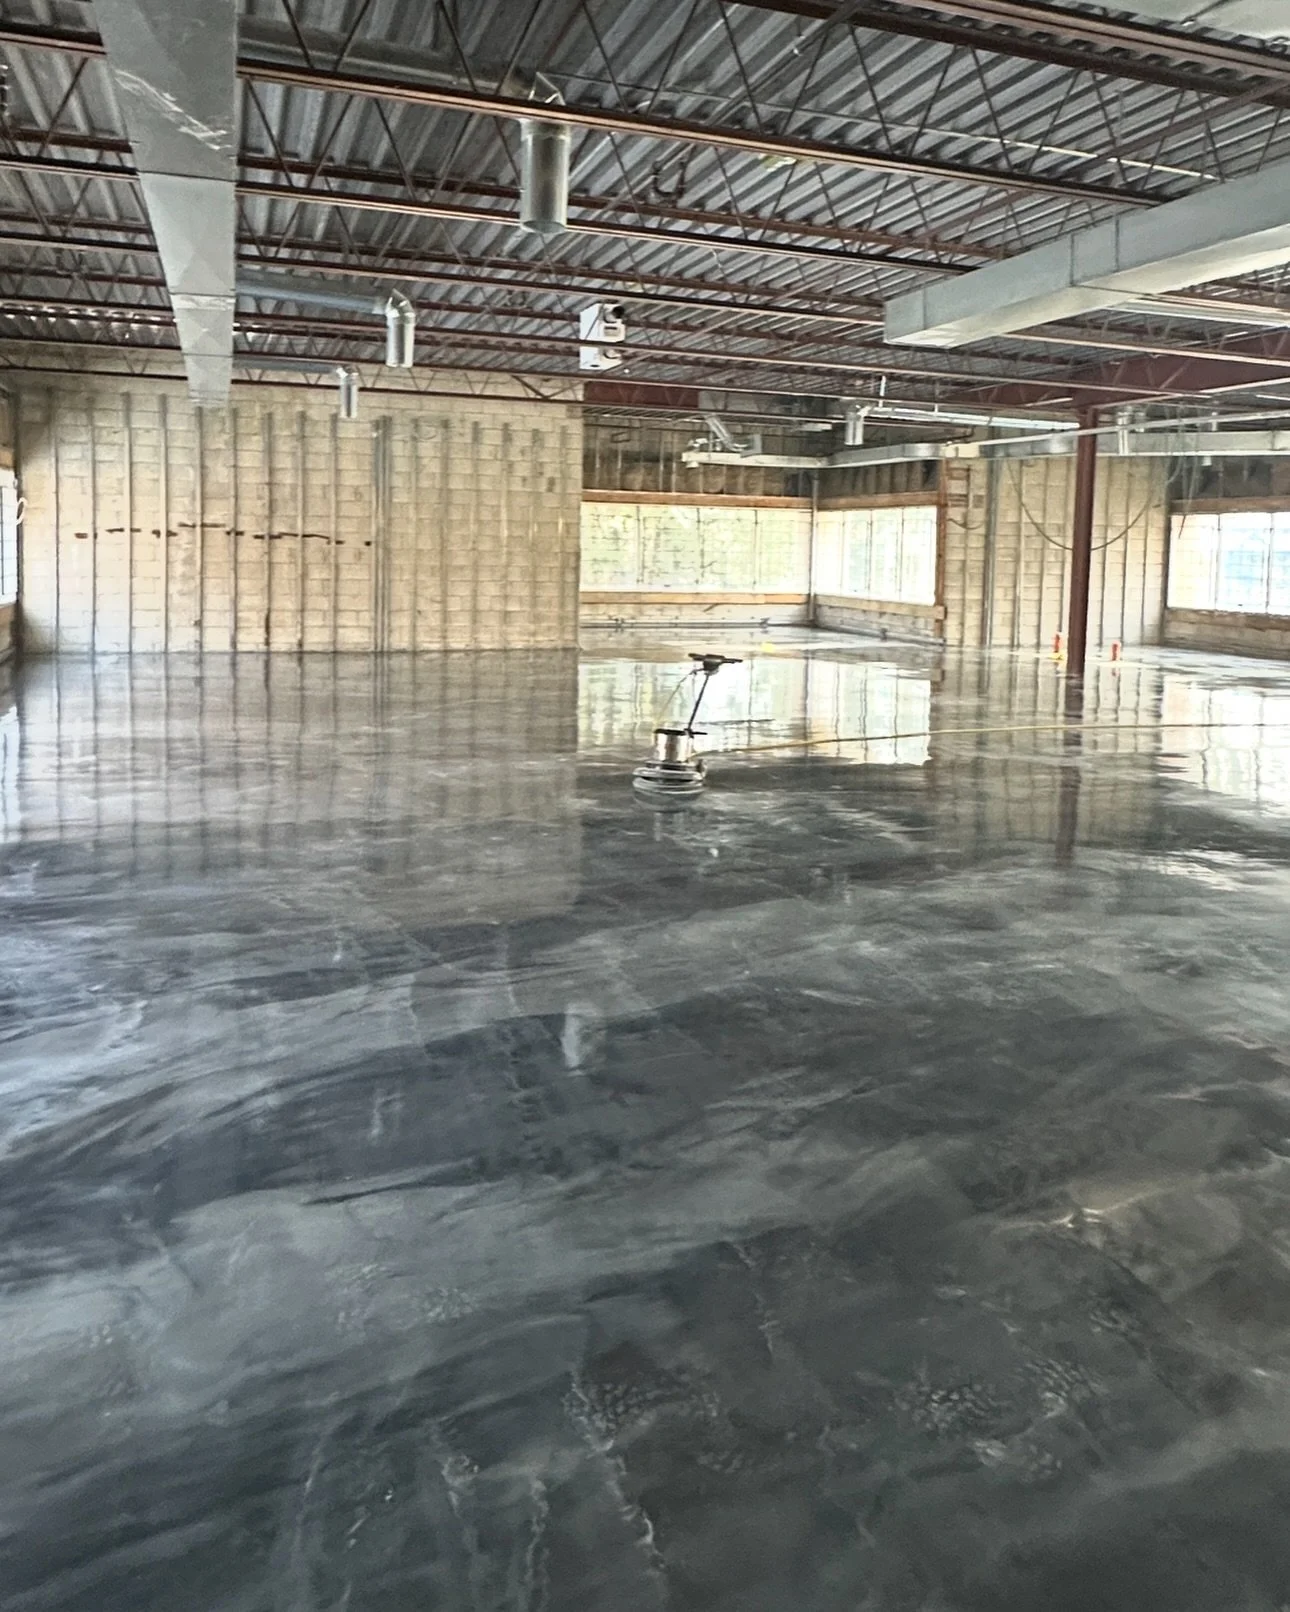
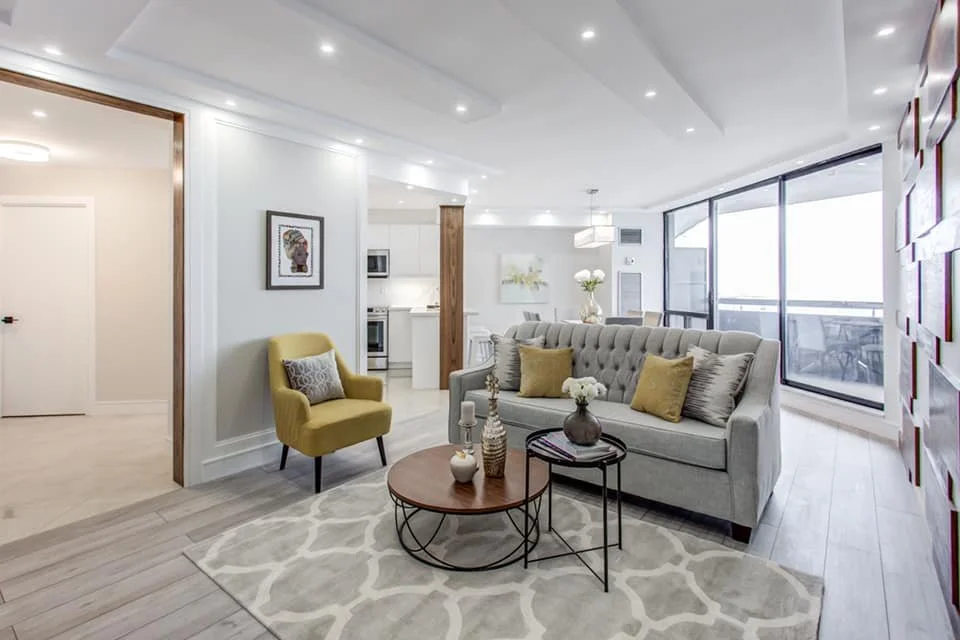
Condo Interior Painting
A beautifully painted interior does more than refresh a space. It completely transforms how a home feels, enhances natural light, and creates an environment that reflects modern living. This condominium showcases the impact that professional painting and finishing can have on a residential interior.
From the moment you enter the space, the bright, neutral color palette creates a sense of openness and sophistication. Soft grey and crisp white tones work together to maximize the natural light flowing through the large floor-to-ceiling windows, making the entire living area feel larger, brighter, and more inviting.
The smooth, flawless wall finish serves as the perfect backdrop for contemporary furnishings and architectural details. Clean lines, recessed lighting, and elegant trim work are highlighted by the freshly painted surfaces, demonstrating how quality craftsmanship can elevate every element of a home's design.
One of the most striking aspects of this condominium is the seamless flow between the living room, dining area, and kitchen. The consistent paint colors tie these spaces together, creating a cohesive and harmonious look that supports modern open-concept living. The result is a home that feels both stylish and comfortable.
Professional interior painting is about much more than applying color to walls. Proper surface preparation, meticulous attention to detail, and high-quality materials ensure a durable finish that maintains its beauty over time. In spaces like condominiums, where every square foot matters, a fresh, professionally applied coat of paint can dramatically increase visual appeal and perceived space.
The subtle color scheme seen in this project also demonstrates a growing trend in contemporary residential design. Neutral tones provide flexibility for homeowners, allowing furniture, artwork, and decorative accents to become focal points while maintaining an elegant and timeless foundation.
Projects like this highlight how thoughtful interior painting can redefine a living space. Whether preparing a property for sale, completing a renovation, or simply refreshing a home, professional painting remains one of the most effective ways to enhance both beauty and value.
A well-painted room isn't just about appearance. It's about creating an environment where people feel comfortable, inspired, and proud to call home. This condominium is a perfect example of how expert finishing touches can transform everyday living into something extraordinary.

Wood Staining Exterior Painting
Why a Professionally Stained Front Door Is One of the Best Investments for Your Home
When it comes to creating a memorable first impression, few features are as important as your front entrance. Before guests step inside, before potential buyers see the interior, and before anyone notices the landscaping, the front door sets the tone for the entire home. The beautifully stained wood entry door featured in this project is a perfect example of how professional wood finishing can elevate curb appeal and showcase timeless craftsmanship.
The Power of a Statement Entrance
A front door is more than a point of entry. It serves as the focal point of the home's exterior and reflects the character of the property. In this project, the rich walnut-toned stain highlights the natural beauty of the wood while creating a warm and sophisticated appearance.
The elegant arched design, decorative trim, and sidelight panels work together to create an entrance that feels both inviting and luxurious. Rather than blending into the home's exterior, the door becomes a standout architectural feature.
Enhancing the Natural Beauty of Wood
Wood is prized for its unique grain patterns, texture, and warmth. Unlike paint, which covers the surface, a high-quality stain enhances the wood's natural characteristics while providing protection.
The finish shown in this project brings out:
Rich wood grain detail
Natural color variation
Architectural depth
Warm, welcoming tones
Premium craftsmanship
The result is a custom look that cannot be replicated with manufactured materials.
Protection Against the Elements
Exterior doors face constant exposure to harsh weather conditions. Sunlight, rain, snow, humidity, and fluctuating temperatures can cause untreated wood to fade, crack, and deteriorate over time.
Professional staining helps protect wood surfaces by:
Blocking harmful UV rays
Reducing moisture penetration
Preventing premature fading
Minimizing cracking and warping
Extending the lifespan of the door
Proper maintenance not only preserves appearance but also protects the homeowner's investment.
Increasing Curb Appeal and Property Value
Real estate professionals often emphasize the importance of curb appeal because first impressions influence how a property is perceived. A professionally refinished front door can dramatically improve the overall appearance of a home without requiring a major renovation.
Homeowners looking to enhance resale value frequently choose entrance door refinishing because it offers:
Immediate visual impact
Cost-effective exterior improvement
Enhanced architectural beauty
Increased perceived value
Long-lasting results
A stunning entrance communicates pride of ownership and attention to detail.
The Importance of Professional Door Staining
Achieving a flawless finish requires more than simply applying stain. Proper preparation, sanding, product selection, and application techniques all contribute to the final result.
Professional staining services ensure:
Consistent color application
Smooth, even finish
Maximum product penetration
Durable protective coating
Long-term performance
Experienced craftsmen understand how to work with different wood species and environmental conditions to produce superior results.
A Timeless Upgrade for Any Home
The entrance showcased in this project demonstrates how professional wood staining can transform a front door into a statement piece. The rich finish enhances the beauty of the wood, complements the home's architecture, and provides essential protection against the elements.
For homeowners seeking a simple yet impactful way to improve curb appeal, protect exterior woodwork, and create a welcoming entrance, professional front door staining remains one of the most effective and rewarding investments available. A beautifully finished door is more than an upgrade; it is the first impression that welcomes everyone home.
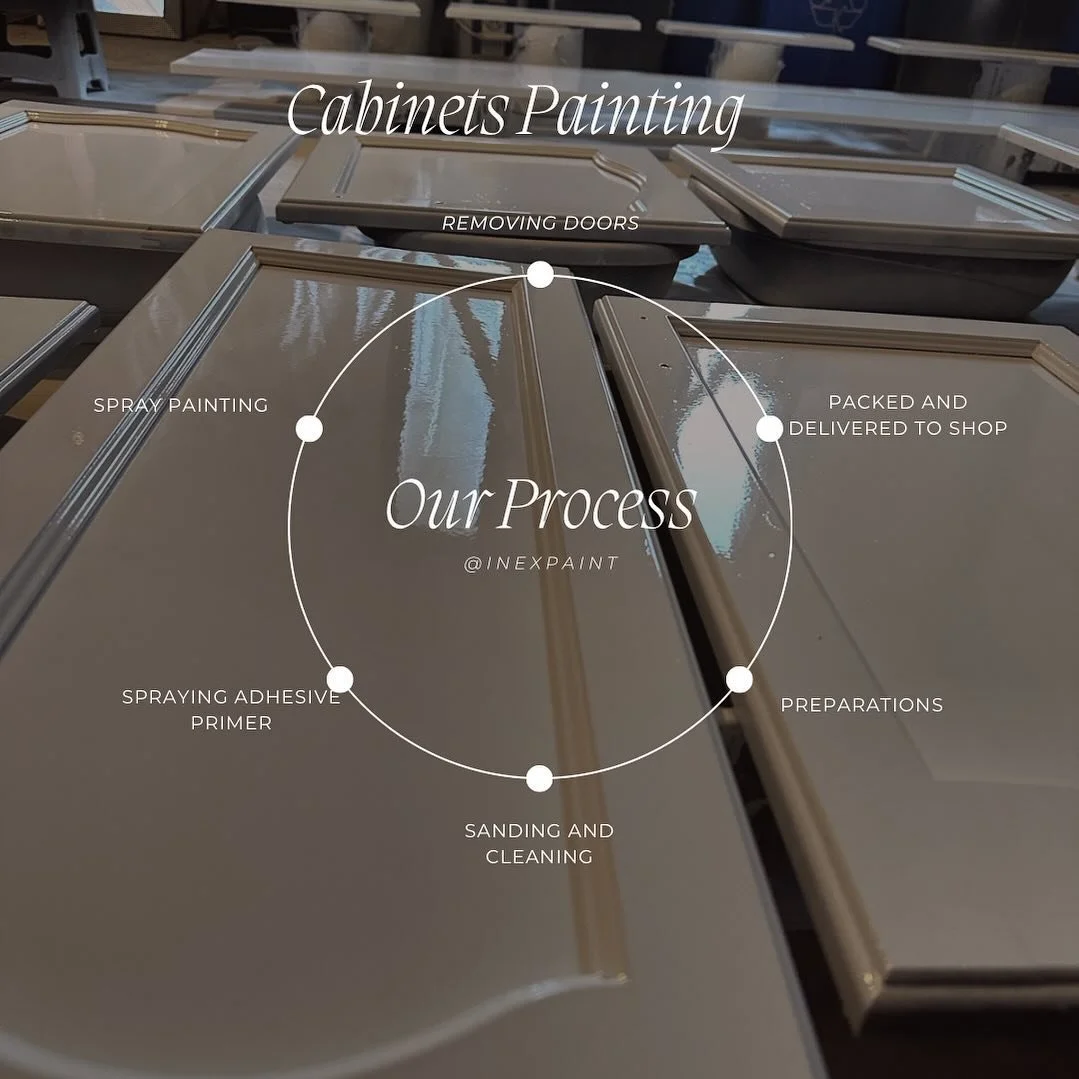
Interior Home Staining
S
Spray Painting Process
Overview Spray painting is a fast, efficient method to apply paint or coatings to surfaces using pressurised air or airless equipment to atomize and distribute the material. It’s widely used in automotive, industrial, commercial and residential applications. A successful spray painting job requires proper surface preparation, the right equipment and settings, correct technique, and careful finishing.
Materials and equipment
Paint or coating suitable for the substrate (acrylic enamel, polyurethane, lacquer, epoxy, waterborne or solvent-borne finishes).
Primer and, if required, sealer or filler.
Spray gun or spray system:
HVLP (high-volume, low-pressure) for fine finish and reduced overspray.
LVLP for low-pressure, high-transfer efficiency.
Conventional (compressed air) for fast application and traditional finishes.
Airless or air-assisted airless for heavy coatings and large surfaces.
Compressor (if using compressed-air guns) sized to deliver required CFM at operating pressure.
Hoses, regulators, filters and moisture traps.
Nozzles/tips matched to material viscosity and desired film thickness.
Mixing cups, strainers, thinning solvents
Spray Painting Process
Overview Spray painting is a fast, efficient method to apply paint or coatings to surfaces using pressurised air or airless equipment to atomize and distribute the material. It’s widely used in automotive, industrial, commercial and residential applications. A successful spray painting job requires proper surface preparation, the right equipment and settings, correct technique, and careful finishing.
Materials and equipment
Paint or coating suitable for the substrate (acrylic enamel, polyurethane, lacquer, epoxy, waterborne or solvent-borne finishes).
Primer and, if required, sealer or filler.
Spray gun or spray system:
HVLP (high-volume, low-pressure) for fine finish and reduced overspray.
LVLP for low-pressure, high-transfer efficiency.
Conventional (compressed air) for fast application and traditional finishes.
Airless or air-assisted airless for heavy coatings and large surfaces.
Compressor (if using compressed-air guns) sized to deliver required CFM at operating pressure.
Hoses, regulators, filters and moisture traps.
Nozzles/tips matched to material viscosity and desired film thickness.
Mixing cups, strainers, thinning solvents and measuring tools.
Personal protective equipment: respirator with appropriate cartridges, eye protection, gloves, coveralls, hearing protection.
Masking tape, paper, plastic sheeting and drop cloths.
Sandpaper, sanding blocks, abrasive pads and abrasive discs.
Clean rags, tack cloths and surface cleaners/degreasers.
Spray booth or well-ventilated area with appropriate fire prevention measures.
Steps in the spray painting process
Planning and safety
Confirm the substrate, coating type and end-use requirements (durability, gloss, chemical resistance).
Review material safety data sheets (MSDS) and ensure suitable ventilation and fire controls.
Select appropriate PPE and ensure training in spray equipment and handling of solvents.
Surface inspection and repair
Inspect the surface for rust, corrosion, cracks, dents, gouges, or old coatings that may fail adhesion.
Remove loose paint, rust and contaminants by scraping, wire brushing, sanding or media blasting as required.
Repair dents, gouges and holes with suitable fillers; allow proper cure time and sand to shape.
Cleaning and degreasing
Remove dust, oils, waxes and other contaminants using an appropriate solvent or cleaner.
Rinse if required by the cleaner and allow the surface to dry completely.
Wipe with a tack cloth to remove fine dust before priming or painting.
Masking and protection
Mask off areas not to be painted using tape, paper or plastic sheeting.
Cover surrounding surfaces and protect fixtures, handles and trim.
Ensure edges are sealed to avoid bleed-through and that masked surfaces are free of debris.
Priming
Select a primer compatible with the substrate and topcoat (rust-inhibiting primer for metal, adhesion-promoting primer for plastics, wood primer for porous timber).
Mix and strain the primer according to manufacturer instructions; thin only as recommended.
Apply primer evenly using proper gun settings and technique; multiple light coats are better than one heavy coat.
Allow recommended flash-off and cure times, then sand primer lightly to remove imperfections and promote adhesion.
Mixing and thinning topcoat
Mix topcoat components (base, hardener, reducer) in the correct ratio if using multi-component systems.
Strain mixed paint through a fine strainer to remove skin or debris.
Adjust viscosity with reducer as needed for the chosen spray equipment and ambient conditions; check with a viscosity cup or follow manufacturer guidelines.
Spray gun setup and test
Fit the correct tip/nozzle and set fluid, air and pattern controls.
Adjust pressure and pattern width for the material and surface geometry.
Perform test sprays on a card or scrap panel to fine-tune atomization, flow and overlap. Look for even coverage, absence of runs, sags or excessive orange peel.
Application technique
Maintain a consistent gun-to-surface distance (generally 6–12 inches for conventional guns; follow equipment guidance).
Hold the gun perpendicular to the surface and move in smooth, even passes.
Overlap each pass by about 50% to ensure uniform coverage.
Apply multiple thin coats rather than one heavy coat to reduce sagging, runs and solvent entrapment.
For edges, use edge techniques (feathering, tipping) to avoid buildup.
Monitor flash-off between coats as recommended; environmental factors like temperature and humidity affect drying times.