
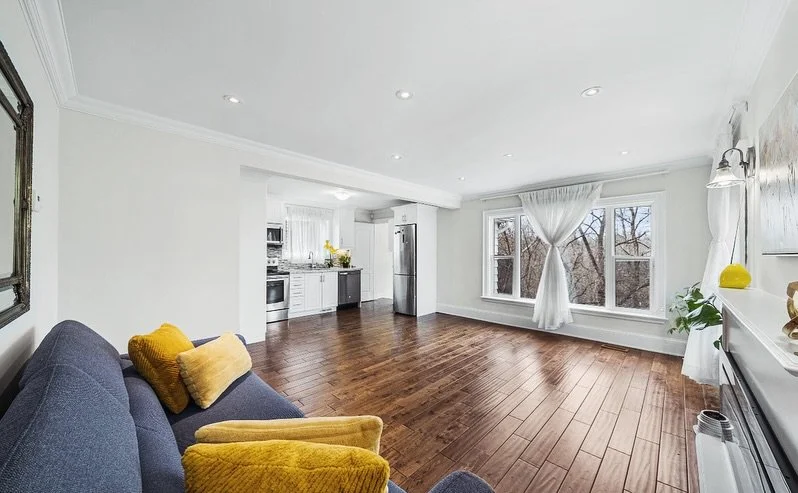
Interior Painting — Family Room
A fresh coat of paint can dramatically transform your family room, making it feel brighter, more inviting, and better suited to how your household lives. Whether you’re updating a neutral palette, covering wear and tear, or choosing an accent wall, this guide covers planning, colour selection, preparation, painting techniques, and aftercare to ensure a professional-looking result.
Planning and preparation
Assess the room: Note wall condition (cracks, holes, stains), type of trim, ceiling height, natural and artificial lighting, and existing finishes (matte vs. gloss).
Calculate paint needs: Measure wall area (length × height for each wall) and subtract doors and large windows. A typical 3.78 L (1 US gallon) can covers roughly 30–40 m² depending on porosity and coats. Buy a little extra for touch-ups.
Choose finish by area:
Flat/matte: Hides imperfections, best for low-traffic walls with minimal cleaning.
Eggshell/satin: Slight sheen, easier to clean — a good choice for family rooms.
Semi-gloss: Durable and washable — typically used for trim and doors rather than large wall areas.
Gather tools and materials: Drop cloths, painter’s tape, high-quality brushes, rollers with appropriate nap (3/8"–1/2" for smooth to semi-smooth walls), roller tray, extension pole, putty, spackling knife, sandpaper (120–220 grit), primer, paint, ladder, caulk, tack cloth, gloves, and rags.
Colour selection
Consider function and mood: Warm neutrals (beige, taupe) add coziness; cool neutrals (soft grey, greige) offer a contemporary feel; muted blues and greens can be calming.
Test samples: Use 10–15 cm test patches on different walls to see how colour shifts with light throughout the day.
Coordinate with furnishings and flooring: Take photos of sofas, rugs, curtains, and flooring to compare with paint chips in the room’s light.
Accent walls and trim: An accent wall can create a focal point behind a fireplace or TV. Trim is typically a crisp white or slightly warm/ cool neutral depending on desired contrast.
Undertones: Be aware of warm (yellow, pink) or cool (blue, green) undertones that affect coordination with wood or metal finishes.
Surface preparation
Clear the room: Remove furniture or move to centre and cover with drop cloths. Take down pictures and light fixtures where practical.
Repair and clean surfaces: Fill holes and cracks with spackling compound, sand smooth after drying, and wipe down walls to remove dust, grease, and fingerprints.
Caulk gaps: Use paintable caulk along trim seams and between trim and wall for clean lines.
Sand and scuff glossy surfaces: If existing paint is glossy, lightly sand to improve adhesion.
Prime when needed:
New drywall, patched areas, or dramatic colour changes warrant primer.
Stained or smoke-damaged walls need stain-blocking primer.
Use bonding primer for problematic surfaces (glossy, previously enamelled).
Painting technique
Cut in first: Use a high-quality angled brush to paint a 5–10 cm border along ceilings, corners, trim, and around fixtures.
Roll larger areas: Load the roller evenly, apply in a “W” or “M” pattern, then fill in without pressing too hard to avoid lap marks. Maintain a wet edge to prevent visible seams.
Apply multiple thin coats: Two thinner coats typically outperform one heavy coat. Allow manufacturer-recommended drying time between coats.
Trim and details: Paint trim after walls or before, depending on preference. If painting trim after walls, protect edges with painter’s tape for crisp lines.
Remove tape at the right time: Pull painter’s tape at a 45-degree angle when paint is dry to touch but not fully cured to avoid peeling.
Ventilation and safety
Ensure good ventilation with windows and fans to speed drying and reduce fumes.
Keep children and pets away until paint fumes dissipate and surfaces are dry.
Use low-VOC or zero-VOC paints for improved indoor air quality.
Cleanup and finishing touches
Clean brushes and rollers per paint type (water for latex, mineral spirits for oil-based).
Reinstall fixtures and outlet covers once surfaces are dry.
Touch-ups: Keep a small amount of leftover paint for future touch-ups. Label the can with room and date.
Assess lighting: Consider upgrading bulbs or fixtures if the new colour changes how light reads in the room.
Maintenance tips
Regularly dust and spot-clean marks with a mild detergent and soft cloth.
For high-traffic areas, choose a higher