
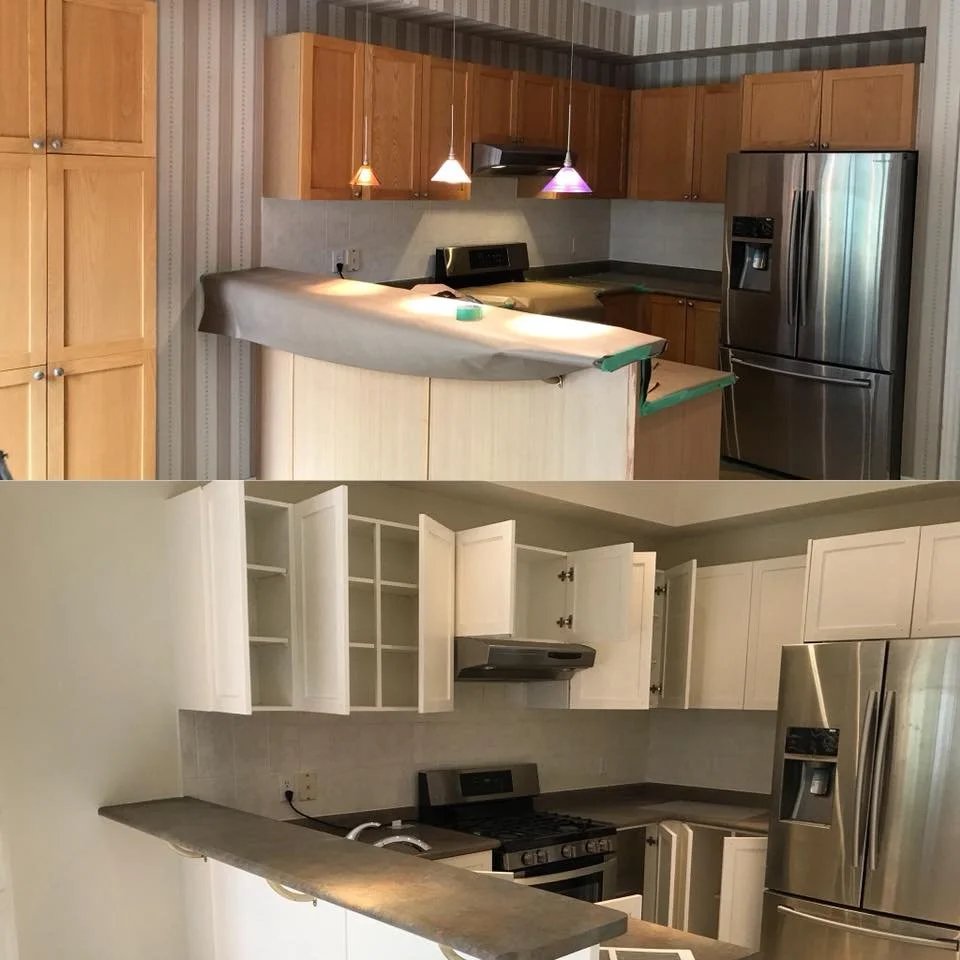
Kitchen Painting Before / After
Why paint your kitchen?
Refresh appearance: Paint is the fastest way to modernize a kitchen without a full remodel.
Increase value: A clean, contemporary finish improves resale appeal.
Protect surfaces: Proper paint and preparation protect cabinets, trim and walls from moisture and wear.
Change mood: Colour and sheen influence perception of space, light and cleanliness.
Before: common issues to address
Grease and grime on walls and cabinets: Cooking splatter builds up and prevents proper adhesion.
Damaged or peeling finishes: Old paint or lacquer may flake, bubble or crack.
Stained or yellowed surfaces: Smoke, oils and sunlight can discolour white or light finishes.
Dated colours and hardware: Dark stains, oak tones or bold wallpaper can make a kitchen feel old.
Inconsistent sheen and patchy coverage: Repairs and previous touch-ups often show through.
Poor surface preparation: Unfilled holes, loose trim or unprimed surfaces lead to short-lived results.
Preparation checklist (what should happen before painting)
Clean thoroughly: Use a degreaser or trisodium phosphate (TSP) substitute to remove oils.
Repair and sand: Fill holes, glue loose veneers, sand glossy finishes to promote adhesion.
Prime: Use a stain-blocking primer for tannin-rich woods, and an adhesion primer for slick laminates.
Remove hardware and appliances where practical: Take off handles, hinges and outlet covers; mask or remove appliances for better access.
Protect surfaces: Cover floors, countertops and appliances with drop cloths and tape off edges.
Ensure ventilation and temperature control: Paint in recommended temperature and humidity ranges for the product.
Popular before-and-after transformations
Dark to bright: Replacing heavy wood stain or dark paint with a soft white or warm neutral opens the space and increases perceived size.
Bold accent to subtle neutral: Removing a single bright wall or backsplash colour and painting a neutral creates a serene, timeless look.
Two-tone cabinetry: Painting upper cabinets a light shade and lower cabinets a contrasting darker tone adds depth and modern interest.
Refreshing island colour: Painting the island a complementary accent colour makes it a focal point without a full overhaul.
Modernizing trim and doors: Switching dated trim to crisp white or a contrasting dark trim updates architectural detail.
Updating open shelving/back walls: Painting the inside of open cabinets or the backsplash wall creates a curated display.
Paint and finish recommendations
Walls: Use a washable, scrubbable acrylic latex in an eggshell or satin finish for durability and light reflection.
Cabinets: Use a high-quality acrylic alkyd or water-based enamel for durability and a smooth finish; choose semi-gloss or satin for easier cleaning.
Trim and doors: Semi-gloss for durability and easy cleaning; for a softer look, satin can be used on interior doors.
Primer: Stain-blocking and adhesion primers where required; shellac-based primers for heavy stains or odours.
Before-and-after workflow (step-by-step)
Assessment: Identify surfaces, materials and problem areas.
Clean and de-grease.
Remove hardware; label and store parts.
Repair wood, fill holes and sand.
Apply primer to bare wood, stains or slick surfaces.
Paint cabinets/doors off the wall if possible for a smoother finish.
Apply paint in multiple thin coats, sanding lightly between coats for cabinets.
Reinstall hardware and touch up as needed.
Final clean and inspect.
Realistic timelines
Walls only: 1–3 days (including prep and drying time).
Cabinets (refinishing in place): 3–7 days depending on number of coats and drying time.
Cabinets removed and painted in a shop: 5–10 days including disassembly and reinstallation.
Full kitchen with minor repairs and hardware updates: 1–2 weeks.
Cost considerations (general ranges)
Walls only: Low cost — paint and supplies.
Cabinets in place: Mid-range — paint, primer, labour for sanding and multiple coats.
Cabinet refinish with professional spray and hardware reinstallation: Higher cost, but less downtime and more durable finish. Factors that influence price: cabinet material and condition, number of doors/drawers, need for new hinges/handles, primer or repair work, and geographic labour rates.
Photography tips for before-and-after shots
Use consistent lighting and camera angles for true comparison.
Shoot wide to show the whole space, and close-ups for detail.
Photograph after cleaning and staging: remove clutter, add simple props like a bowl of fruit or neutral dishware.
Use natural light where possible; avoid harsh shadows or mixed lighting.
Colour and style trends (2026)
Warm neutrals: Off-whites, warm greiges