
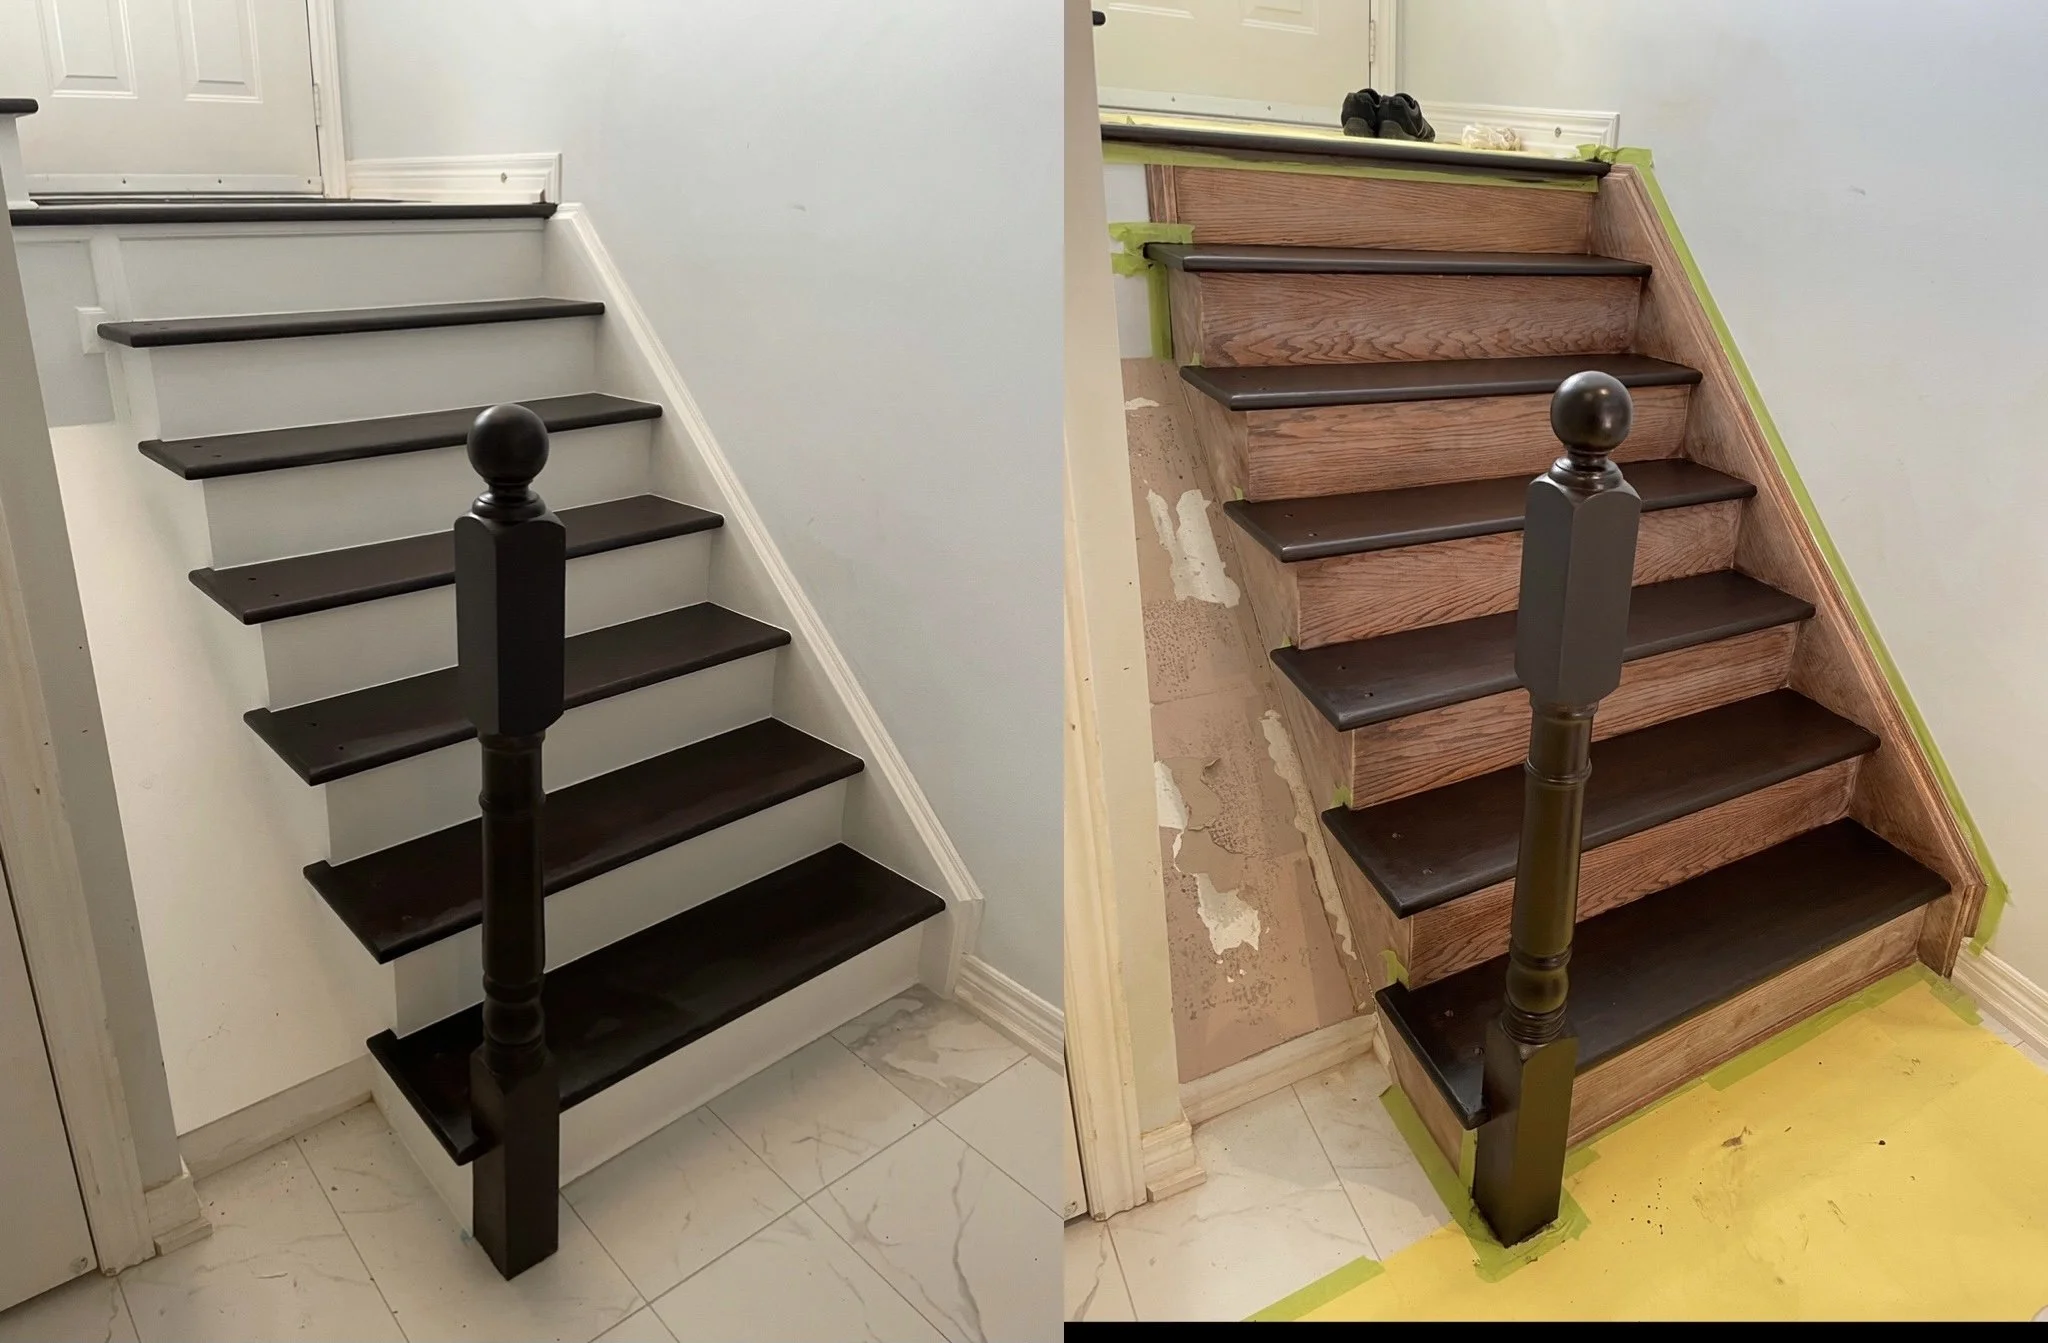
Before and After Staircase Painting & Staining:
Before and After: Staining and Painting Stairs
Before
Condition assessment: Inspect treads, risers and stringers for loose boards, squeaks, rot or splits. Check for old finishes—varnish, paint or polyurethane—that will affect adhesion.
Cleaning: Remove dirt, dust and grime with a stiff brush and a household cleaner. For greasy buildup, use a degreaser. Allow surfaces to dry completely.
Repairs: Tighten loose screws or add screws into stringers and risers. Replace damaged treads or risers. Fill small holes and cracks with wood filler; let it cure and sand smooth.
Stripping (if needed): If there’s thick old paint or varnish, strip with a chemical stripper or use an orbital sander. Take proper safety precautions—ventilation, gloves and eye protection.
Sanding: Sand to remove remaining finish and to level filled areas. Start with 80–100 grit for rough removal, then progress to 120–150 grit for a smooth surface. Vacuum and tack cloth to remove dust.
Priming (for painting): Apply a high-quality stain-blocking primer to bare wood or previously painted surfaces to ensure adhesion and uniform coverage. Let primer dry according to manufacturer’s instructions.
Testing stain/paint: Test chosen stain or paint on a concealed area or scrap wood to confirm colour and sheen. Wood species will affect stain appearance.
After (Staining)
Application: Apply stain with a brush, rag or foam applicator, following the wood grain. Wipe off excess after the recommended dwell time to achieve the desired depth of colour.
Drying: Allow stain to dry fully—often 24 hours but follow product instructions and local humidity conditions.
Protective finish: Apply a clear topcoat suitable for floors and stairs, such as an oil-modified polyurethane, water-based polyurethane, or hardwax oil. Use a durable, scuff-resistant formula rated for high traffic.
Sand between coats: Lightly sand with 220–320 grit between coats to ensure adhesion and smoothness. Clean dust before the next coat.
Number of coats: Typically 2–3 coats of polyurethane for stairs, depending on manufacturer recommendations and usage expectations.
Final cure: Full cure can take several days to weeks; avoid heavy traffic until the finish has developed sufficient hardness.
After (Painting)
Application: Use a high-quality floor or trim paint formulated for durability. Apply with a brush for edges and a short-nap roller for flat areas. Work in thin, even coats to prevent drips.
Non-slip considerations: Add a non-slip additive to the topcoat or use paint with built-in grit for safety on treads.
Drying and recoating: Follow paint manufacturer’s recoat times. Two coats are common for full coverage.
Protective topcoat (optional): For extra durability, apply a clear water-based or oil-based polyurethane compatible with the paint.
Clean lines: Use painter’s tape for riser/tread transitions and remove tape while the final coat is slightly tacky to avoid peeling.
Final Inspection and Maintenance
Cure time: Respect recommended curing times before allowing regular foot traffic or moving furniture.
Hardware reinstallation: Reinstall or replace stair nosing, moulding and hardware after full cure.
Maintenance: Clean regularly with a pH-neutral cleaner and avoid abrasive tools. For painted stairs, touch up chips promptly. For stained stairs, monitor wear on high-traffic areas and refinish when finish is thin or damaged.
Safety and appearance: Ensure non-slip surfaces remain effective; replace or refresh grit additives as needed. Reassess lighting and handrails for safety and visual impact.
Visual transformation summary
Before: Worn, dull or mismatched surfaces; visible damage; uneven colour; unsafe or tired appearance.
After (stained): Richer wood tone, enhanced grain, durable clear finish, natural look preserved.
After (painted): Clean, uniform colour, modern or classic style options, potentially higher contrast and renewed brightness.
Estimated timeline (typical)
Prep and repairs: 1–2 days (depends on extent of repairs and drying times)
Staining route: Stain day, then 2–3 days for clear coats and light sanding between coats → 3–7 days total.
Painting route: Primer + 1–2 paint coats + optional topcoat, with drying between coats → 2–5 days total.
Materials checklist
Safety gear: dust mask/respirator, gloves, eye protection
Cleaning supplies: degreaser, rags, brushes
Tools: sander, sanding discs, vacuum, tape measure, drill/screwdriver
Finishing supplies: primer (if painting), stain, paint, polyurethane/topcoat, brushes, rollers, tack cloth